
This page will overgo the basics of the game mode Replicard Sandbox and general farming strategies for it.
Arcarum Pages


About
Replicard Sandbox is a permanent game mode that is the sequel to Arcarum. In order to unlock it, the player must clear all Extreme routes in standard Arcarum.
Like Arcarum, the primary purpose of this mode is to get mats for Evokers.
Unlike Arcarum, Sandbox does not have time restrictions on farming. This makes it a much faster way to acquire Arcarum mats if you put the time in for farming. Additionally, there are new mats that are used for New World Foundation weapons, Evoker domains, and Evoker FLBs. There are also other weapons available from drops as well AX skills on a few weapon series.
Additionally, the lack of time gating means you don’t need to rush this mode. So feel free to work on having developed grids before tackling this mode so farming is easier.
Mechanics
Sandbox features a variety of mechanics specific to the mode.
AAP
Sandbox uses its own form on AP called AAP. There is no functional difference between the two including the ability to restore AAP with pots. However, AAP will be restored to 100 at the beginning of every day.

Map
Unlike Standard Arcarum, the maps in Sandbox are pernament and feature a set of repeatable quests. Initially the nodes of the map will be grayed out requiring using AAP to unlock them. After doing so they will remain visible.

Enemies
The standard nodes on the map feature basic mobs. They have generally low health especially the ones with 5 gauges on them. These mobs fights drop Arcarum mats and the fast clear times on them make them ideal for spawning sephira chests.

Clearing these fights repeatedly so the gauge on them fills all the way causes a stronger enemy to spawn called a defender. While defenders don’t offer much on their own outside of Area 3, they drop another item to be able to fight the boss of the area.

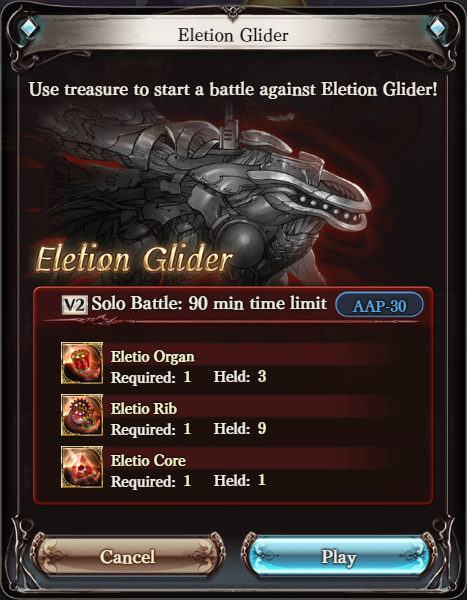
In order to fight the boss, you need the a host mat which drops from each defender in the area. Area 1 requires 3 mats from 3 defenders and Area 2 only needs 2 mats from 2 defenders. The Zone boss is a harder fight that will upgrade in difficulty after the first clear. Bosses drop a mat called Lusters that are the main reason for clearing them.
Area 3 is the main exception to this with Lusters instead dropping from the Defenders of the area. The boss of the Zone is locked behind having an FLB Evoker and it instead drops World Ideans.
Area 2 also contains another set of bosses based on the Xeno fights. These Xeno Militis fights use a special host mat called Doppelworld Sextant. One is recieved per day and stack to near infinite. Special chests appear after fights either randomly or by filling the meter. They contain valuable loot most notably evolites in the water and earth battles and gold bars in the wind and fire. There is the secondary counter on the bottom that counts chests since last time you recieved the bar or evolite. Once all 5 chests are marked, your next chest will be guarenteed to be the lucky loot. That said you can get them at any point beforehand if you are lucky. This guide does not contain any specific teams for this fight but the HP is a bit higher than first runs of defenders so you can use the same team as a defender with them.

There are two other important enemy types that randomly spawn after completing another fight. Depending on the player, some may stop to restore the AAP when available. Though for players with a focus on speed, it is advised to ignore them and get more clears in.

The other are Heralds which tie into the next topic.
Sephira Gauge

Each area has a set of meters called Sephira gauges. In Here Be Staves, there are three in total one for each evoker in the region. In Here be Swords, there are only two: one for each element. In Zone Mundus, there are six also one for each element.
When clearing battles, these will begin to fill up, the higher the gauge the higher the chance of spawning a Sephira chest after battle. These chests contain bonus loot and are the best source of ideans and astras as well as the only way to farm Veritas. They can also contain weapon drops. After getting one, the meter will reset.

Defeating Heralds will give the corresponding gauge The Tidings of Sephira effect which provides the following benefits.
- 1 hr (24 max)
- 50% EXP (200% max)
- 50% RP (200% max)
- 100% gauge boost
Extra Slots

Like standard Arcarum, there is no support summon selection. However unlike it, there are two mechanics to help make up for it. One of these are Extra Slots. In Arcarum, you can unlock up to three additional slots by clearing all the zones in a given area. Unlike standard slots, these ones have restrictions on which weapons can fit in them.
Guide Books

The other Sandbox mechanic to help are Guide Books. These are additional stat or mechanic boosts that can be equipped. Up to three can be equipped at once, with one unlocked via the tutorial, and one from clearing Staves and Swords each. Guidebooks are very powerful with the ones introduced in each new zone being stronger than the last.
They are also a primary reason for clearing missions in Sandbox as they receive major upgrades from them.
The most notable of these are:
Shockwave’s Guidebook Greatly improves normal attacks.
is simply the best guidebook available. At base it provides 1 time party GTA and gains 30% echoes, 200k normal attack supp, and 20% normal cap when fully maxed. This will be BIS for every content in Sandbox except for CA based teams. The main restriction to it is that its locked behind clearing Gilgamesh in Area 3, but it is very much worth rushing there to unlock it.
Greatly improves normal attacks.
is simply the best guidebook available. At base it provides 1 time party GTA and gains 30% echoes, 200k normal attack supp, and 20% normal cap when fully maxed. This will be BIS for every content in Sandbox except for CA based teams. The main restriction to it is that its locked behind clearing Gilgamesh in Area 3, but it is very much worth rushing there to unlock it.
Avarice’s Guidebook Boosts Bounty Hunter lvl and EXP.
increases EXP gain by 20% and more importantly adds 4 bounty to the start of every fight. This winds up being very substational in the extended farming sessions of Sandbox resulting in this being the highest value book to have. This is unlocked by finding and defeating an enemy in Zone Harbinger called the the Emerald Machina.
Boosts Bounty Hunter lvl and EXP.
increases EXP gain by 20% and more importantly adds 4 bounty to the start of every fight. This winds up being very substational in the extended farming sessions of Sandbox resulting in this being the highest value book to have. This is unlocked by finding and defeating an enemy in Zone Harbinger called the the Emerald Machina.
Valor’s Guidebook Grants Bonus DMG effect and more.
in many ways an earlier weaker version of Shockwave providing only 20% echoes. However, it also comes with Mirror Image which is great for nullifying several annoying entry triggers on Non P Type Zone bosses. And on top of that, the echoes from both it and Shockwave stack making for an incredibly strong auto attack pairing. This is obtained from Clearing Zone Faym.
Grants Bonus DMG effect and more.
in many ways an earlier weaker version of Shockwave providing only 20% echoes. However, it also comes with Mirror Image which is great for nullifying several annoying entry triggers on Non P Type Zone bosses. And on top of that, the echoes from both it and Shockwave stack making for an incredibly strong auto attack pairing. This is obtained from Clearing Zone Faym.
There are also two books with a focus on skill damage. Adept’s Guidebook Improves skills.
which provides 12% skill cap and 200k skill up and Specialist’s Guidebook
Improves skills.
which provides 12% skill cap and 200k skill up and Specialist’s Guidebook Improves skills and charge attack.
with 20% skill cap and 300k skill supp. Specialist also comes with 20% CA cap. Both are excellent for any skill damage based teams like ones with Manadiver. Adept is from clearing Area 2’s Zone Invidia while Specialist is from defeating Prometheus Militis in Area 3’s Zone Mundus.
Improves skills and charge attack.
with 20% skill cap and 300k skill supp. Specialist also comes with 20% CA cap. Both are excellent for any skill damage based teams like ones with Manadiver. Adept is from clearing Area 2’s Zone Invidia while Specialist is from defeating Prometheus Militis in Area 3’s Zone Mundus.
For OTK, Overflow’s Guidebook Improves charge bar related effects.
provides an extra 40% starting charge. This enables 0B4C setups for all elements. Generally, a fully maxed Shockwave is strong enough to carry even weaker grids, but this is a great alternative.
Improves charge bar related effects.
provides an extra 40% starting charge. This enables 0B4C setups for all elements. Generally, a fully maxed Shockwave is strong enough to carry even weaker grids, but this is a great alternative.
Progression
After clearing the Sandbox tutorial, you will be left to clear the first four Zones. You will want to fully explore each map and fight each fight in it including farming host mats to clear the boss. This will both unlock all available guidebooks from this zone and more importantly the 11th slot for Extra grids.
Advancing to the next Area will depend on whether you have an Evoker already unlocked. If you don’t, you’ll be stuck in Area 1. During this period, will want to primarily focus on recruiting your Evoker. It would also be helpful to level up Avarice’s Guidebook
Boosts Bounty Hunter lvl and EXP.
to improve drop rates. Even if you have an evoker it might be worth leveling it first.
Once Area 2 is unlocked, you’ll want to do the same as Area 1 and unlock everything and fight the bosses again. This will both unlock the 3rd guidebook slot as well as the 12th weapon slot.
Unlike with Area 2, Area 3 only requires clearing Area 2 to proceed and you should move on immediately. Like the others, you’ll want to clear everything you can. The 13th guidebook for this zone is locked behind clearing all defenders as the boss of it locked behind having an FLB Evoker. Thankfully, the defenders in this area drop Lusters instead of the boss and the mats from the boss can be farmed from The World Raid instead.
Generally after this, you can choose what you want to priortize.
Clearing more missions to level more guidebooks is extremely helpful for making farming easier. Aim for the ones you plan to use first as well the Universal Guidebook as it provides strong boosts and will always be slotted. Many of the Guidebook upgrades are from generic mission completion mission. Therefore clearing out a lot of 1, 3, and 10 defeats missions before starting the longer 30 and 50 clear missions will lead to a lot of quick progress on it.
Otherwise the focus is farming for whatever drops you need whether its aiming for AX skills on weapons or ideans and astras for evokers or New World Foundation weapons. Generally the best Area for farming anything is in Area Mundus due to it providing everything Sandbox has to offer. The main exceptions to this is farming Zone 1 for Omega 1 weapon AX skills or Zone 2 for Primal weapon AX skills.
Another good thing to do before going hard into farming Sandbox is to farm the World Raid in order to unlock the World Weapons. At the very least a 0* copy of each will prove very valuable thanks to it both being a strong weapon and being able to be slot it in extra slots. When starting out, you won’t have many weapons that can fit in the Extra slots so it is very valuable for that reason alone.
How to Farm
To make things easier, you want to farm standard mobs and defenders or bosses seperately.
When it comes to farming mobs, the key like with boxing events is speed above all else. Max drop rates where you can but if you can clear it faster without them do so. For efficient menuing, check the menuing page for how to menu arcarum effeciently.
When starting out, you’ll want to periodically check for Heralds to spawn. Maxing out the Sephira bonuses will be beneficial to farming. After that you can stop checking for them unless you want to extend your session past four hours.
Mimics are not worth stopping for from a speed perspective. Clearing mimics as well as checking for them typically breaks the flow of farming and requires more involvment and time then skipping them. That said its worth popping them from time to time if you still need the mimic mantura.
Having another window open to restore AAP when it gets low is also advisable.
For Defenders and Bosses, you can manual them or FA them. This guide in particular covers FA strats as many players (and myself) will auto these while playing other games or at work.
Where to Farm
| Item | Location |
 Astras | Any 5-Gauge or 3-Gauge node and Sephira Chests |
 Ideans | Any 5-Gauge or 3-Gauge node and Sephira Chests |
 Veritas | Sephira Chests (Best from spamming 5-gauge) |
 Verum Proofs | Zone 1 Fire => Eletio: Slithering Seductress Water => Faym: Trident Grandmaster Earth => Goliath: Vestige of Truth Wind => Harbinger: Harbinger Hardwood |
 Fragments | Area 1 Heralds, Area 2 Bosses, Area 3 Defenders (Very rare drop rate. Not worth farming specifically for) |
 Boss Host Mats | Defenders from Areas 1 and 2 |
 Lusters | Mundus Defenders or Area 1 and 2 Bosses |
 Gospels | Mundus defenders or the World Raid |
 World Ideans | The World in Mundus or the World Raid |
 Omega AX Skills | Area 1 (Best) or Zone Mundus |
 Primal AX Skills | Area 2 (Best) or Zone Mundus |
8 responses to “Replicard Sandbox”
slight typing mistake, lusters is written twice instead of veritas, might get someone confused, also this comment box when in dark mode has text preview in black while typing, going white only when not in focus so it’s kind of hard to write. 👍
Is here be staves the best way to farm a specific idean if i can 0 butt9n the 3 gauge enemies?
727 wysi
kill yourself
Thanks!!!
Thanks for this
Veritas also drop from zone 2 and 3 defenders.
Zone 3 at least is 100% drop rate split over 3 types.
If you want to target farm specific veritas spam 5 gauge nodes in Staves while having max sephira boost and farm until you have 100 boxes.
If you don’t mind splitting veritas for evokers of the same element, spam swords or mundus nodes.
Also don’t forget to do regular arcarum runs. At the end of each boss you can 4-5 ideans plus the idean for defeating the boss. just stack some tickets and skip the zone.