Wilnas is the fire raid of the 6 Dragon series. This guide will go over the basic details of the fight as well as setups for fighting it. For more detailed mechanics information, please check the wiki.
Overview
Information
- JP Name: ウィルナス
- Total HP: 464,000,000
- Defense: 18
- Blue Chest: 12.5% chance at 50% health.
Links
Drops

- Used to uincap various weapons, summons, eternal trascendance, and for exchanging for earrings.

- Highly useful mat for uncapping weapons and summons as well as hosting Mugen.

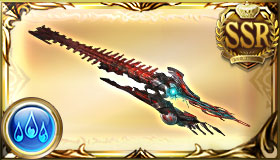
Hadron Claw |
Massive fire DMG to a foe (All allies gain Shield.)
Additional effect at 4★: Also remove 1 debuff from all allies. |
|---|
|
Firestorm’s Enmity
|
Massive boost to fire allies’ ATK based on how low HP is |
|---|---|
|
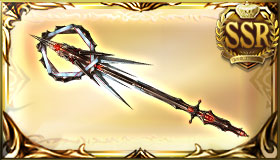
Vermillion Covenant
|
Supplement Fire allies’ damage based on how low HP is. |
- Enmity supp weapon.
- Safe to fodder.

- Gives Aetherial Mastery bonuses to Fire characters

- Extremely rare item used for New World Foundation weapon ULBs and summon transcendence
Blue Chest Setups
6 dragon raids use a non guarenteed blue chest system. As a result, people aim for a 1-2 turn burst to quickly maximize damage. Typically people will aim for 700k-1.2m honors.
Due to the desirability of earrings, these raids will explode during doubles drops and before gw. During those periods, depending on ping, you will need faster, lower damage setups potentially down to 0b setups.
Beginner
These setups are oriented towards beginner players.
Relic Buster 
Relic Buster is the easiest way to achieve a blue chest. Limit Burst![]() All allies gain Charge Bar, C.A. DMG Boosted (1 time), and C.A. DMG Cap Boosted (1 time) based on number of Machine Cell.
All allies gain Charge Bar, C.A. DMG Boosted (1 time), and C.A. DMG Cap Boosted (1 time) based on number of Machine Cell.
(Consumes all Machine Cell.)
makes it simple to to perform a teamwide charge attack burst. It also supports a wide variety of characters and is very flexible grid wise. Weaker grids and characters may need to press additional buttons to reach the desired damage.

")


")


")


Rotation
- Turn 1
- Relic Buster

 Gain 5 Machine Cell (Max: 5) and restore HP (Healing cap: 2000).
(When HP is 50% or above: Also gain Strength (45%-15%, 3T).)
Level 30:
(When HP is below 50%: Also gain Jammed (30%-90%, 3T).) , All allies gain Charge Bar, C.A. DMG Boosted (1 time), and C.A. DMG Cap Boosted (1 time) based on number of Machine Cell.
(Consumes all Machine Cell.) 
- Relic Buster
- Turn 2
- Qilin

- Relic Buster
Gain 5 Machine Cell (Max: 5) and restore HP (Healing cap: 2000).
(When HP is 50% or above: Also gain Strength (45%-15%, 3T).)
Level 30:
(When HP is below 50%: Also gain Jammed (30%-90%, 3T).) ,
All allies gain Charge Bar, C.A. DMG Boosted (1 time), and C.A. DMG Cap Boosted (1 time) based on number of Machine Cell.
(Consumes all Machine Cell.)
- Qilin
Notes
- All characters can be subbed out for characters with Unworldly CAs or skill nukes after CA.
- Huanglong
 support also works.
 - Selene (Water)
 is the best MH for this for it’s strong Charge Attack and not needing to press RB1 on turn 2.
Rising Force
After aquiring a couple of Tyros Zithers, one can move onto using Rising Force to try a 1 turn setup. This is mainly thanks to Bonito’s ability to fill 200 charge on all allies with its first call. Like with Relic Buster, these setups are pretty flexible with character choice and makes 200 charge bar characters like Vajra
 highly valuable.


")


Rotation
- Turn 1
Notes
- All characters can be subbed out for characters with Unworldly CAs, 200 charge bar, or skill nukes after CA.
Advanced
These setups are oriented towards players with stronger grids and characters.
Manadiver 1B 
The Chain of Falsehood grants teamwide double strike on charge attack. This allows for very quick and easy damage. While these setups are faster thanks to not having to deal with CA lockout, they are more restricted character wise requiring characters with guaranteed triple attacks to pull off.


")


Rotation
- Turn 1
- Warlock

 Convert caster’s HP to charge bar (3% charge bar for every 250 HP consumed, up to 100% charge bar).
(Consumes up to 50% of current HP.)
- Warlock
Notes
- Can use be any GTA character like Gwynne
 or Anne
 (with Belial (Summer)
 ).
).
Rising Force
After setting Rising Force up with Bonito the player can get a few turns out of CAs out of it. With Poseidon , a lot more charge attacks can be dealt in a row but otherwise it is easy to attack for a couple turns and deal a lot of deal.
Rotation
- Turn 1
- Turn 2
- Poseidon S2
 150% Water damage to all foes (Damage cap: ~340,000).
All allies gain ATK Boosted (Stackable) (5% (30% Max), Multiplier: Unique Stackable), DEF Boosted (Stackable) (5% (30% Max)), and Charge Bar (20%).
(Consumes all Tide Father lvls. Boost to activations based on number consumed [Max: 10 times].)
- Poseidon
- Turn 3
- Rising Force

 Elemental damage to a foe. Consume all Feedback on all allies.
(Boost to damage specs and charge bar based on number of Feedback consumed.)
- Rising Force
Rotation (without Poseidon)
- Turn 1
- Turn 2
- Turn 3
- Turn 4
- Rising Force
Elemental damage to a foe. Consume all Feedback on all allies.
(Boost to damage specs and charge bar based on number of Feedback consumed.)
- Rising Force
Notes
- Can replace any slot with another strong CA character like Mirin (Holiday)
 or Zeta (Water)
- Use alt rotation if replacing Poseidon.
Warlock
Normal attack focused setup using the Chain of Falsehood to have a turn of teamwide double strike. Warlock’s Ultimate Mastery skill Arcane Field![]() Gain Arcane Field (Multiplier: Perpetuity).(Effect ends when Arcane Field (Multiplier: Perpetuity) lvl is 7 or charge bar is insufficient at end of turn.)
is an excellent damage boost for grids that have issues with capping as well as providing TA to help those without GTA.
Gain Arcane Field (Multiplier: Perpetuity).(Effect ends when Arcane Field (Multiplier: Perpetuity) lvl is 7 or charge bar is insufficient at end of turn.)
is an excellent damage boost for grids that have issues with capping as well as providing TA to help those without GTA.


Rotation
- Turn 1
- Beelzebub

- Warlock
Convert caster’s HP to charge bar (3% charge bar for every 250 HP consumed, up to 100% charge bar).
(Consumes up to 50% of current HP.) Fill 3 charge diamonds on all foes.All allies gain Bonus DMG (20%, 3T), Charge Boost (30%), and 1 Elemental Crest (Hellfire CrestDeluge CrestWasteland CrestTyphoon CrestAurora CrestOblivion Crest).(Crest gained based on caster’s element.)
 Gain Arcane Field (Multiplier: Perpetuity).(Effect ends when Arcane Field (Multiplier: Perpetuity) lvl is 7 or charge bar is insufficient at end of turn.)
- Anre
 S2
S2 Gain Substitute (1T) and Counters on Dodge (3 times, 3T).
Level 95:
Also gain Fleeting Spark (280%, Multiplier: Assassin, 1T) - Gabriel
 S2
S2
- Beelzebub
Reference Video
Notes
- Characters can be replaced by any strong attacker or buffer.
- If replacing Gabriel, will need Lucio (Summer)’s
 skill 3 for Anre to have 100% TA.
Manadiver
Similar to Warlock Manadiver offers teamwide bonus damage and can wield Falsehood opus. Unlike Manadiver, it offers stronger output at less buttons making it a faster option. To emphasis the difference, the characters in the below setup are focused on speed over damage.
Rotation
- Turn 1
- Beelzebub
- Manadiver
Convert caster’s HP to charge bar (3% charge bar for every 250 HP consumed, up to 100% charge bar).
(Consumes up to 50% of current HP.) ,
Fill 3 charge diamonds on all foes.All allies gain Bonus DMG (20%, 3T), Charge Boost (30%), and 1 Elemental Crest (Hellfire CrestDeluge CrestWasteland CrestTyphoon CrestAurora CrestOblivion Crest).(Crest gained based on caster’s element.)
- Beelzebub
Reference Video
Notes
- Can replace with any GTA character.
Soldier
Hraesvelgr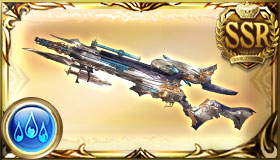 is a 150 gold moon that is as strong as it’s investment is high. Soldier setups rely on it’s high strength and power.

")


Rotation
- Turn 1
- Yatima

- Lucio (Summer) S1
 All allies gain Bonus Water DMG (20%, 3T) and Charge Bar (20%).
S3
All allies gain Bonus Water DMG (20%, 3T) and Charge Bar (20%).
S3 Grant a Water ally Bonus Water DMG (90%, 2T), Guaranteed TA (2T), 70% Fire Cut (2T), and Debuff Resistance Boosted (100%, 2T).
=>
Grant a Water ally Bonus Water DMG (90%, 2T), Guaranteed TA (2T), 70% Fire Cut (2T), and Debuff Resistance Boosted (100%, 2T).
=> 
- Soldier
 Gain Ammunition Belt (3T).
 Deal one-foe attacks until all bullets are consumed.
 Gain Guaranteed TA (1T) and instantly perform a normal attack without using up a turn. (Consumes bullets.)
Level 30:
Also gain Adversity (20%, 1T). - Payila
 S3
S3
- Yatima
Notes
- Payila can be subbed with:
- Catura (Holiday)

- T1: S2
 Caster and Water MC gain Double Strike (4T).
- T1: S2
- Erika

- T1: S1
 Another Water ally instantly performs a normal attack without using up a turn.
(Consumes Tactical Edge to end cooldown.) => Soldier
- T1: S1
- Catura (Holiday)
Full Auto
Players can also choose to full auto their own host. While it is slower than blue chesting, it is an easy way to get another drop chance with minimal effort. The following strategies focus on soloing the raid which is particularly helpful for slow periods. But it is strongly reccomended to call up backup request after securing a good blue chest chance to speed up the clear.
Relic Buster
Relic Buster offers a good balance of attack and defense making it a great option for full auto. Stacking this with other forms of defense can make for a reliable and relative fast FA.
![]()
![]()


Notes
- Societte
 is particularly helpful due to her mirror image on CA blocking a lot of Wilnas’s harder attacks.
 - Characters are generally flexible with strong options being Poseidon, Lancelot (Grand)
 , Vajra, Vikala (Halloween)
 , Yngwie (Legend of Bravado and Revelry)
 , Cagliostro (Summer)
 , or Fediel (Summer)
 .
. - Stronger setups particularly those with Poseidon can turn Auto Guard off.
Manadiver
Manadiver is an easy way to deal with heat ray’s 3.5m skill damage cancel. With that dealt with, it is very easy to go all in on damage as the only other omen that can’t be cancelled is easily ignored..
![]()
![]()


![]()
![]()


![]()
![]()

Reference
Notes
- All characters can be easily replaced by other damage dealers.
- Upgrading mantra to Ouroboros will allow for a faster clear.
Cavalier
The 150 GM weapon Hraesvelgr quickly tears through content thanks to effectively being multiple grand weapons condensed into one. Cavalier’s Ultimate Mastery skills help overcome the weaknesses of Hrae for Full Auto setups.
![]()
![]()

")

Reference
Other Raids
Links to the other raids.
Raid Pages


2 responses to “Wilnas”
With side story Home Sweet Moon, I’m have access to some Relic Buster weapon, wich you recomend me?
Best bet is to get a gun for an element you have a weaker OTK in or still rely on RB bursts. Its generally the best MH for RB charge attack stuff.