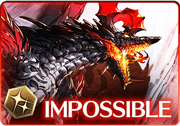
Shiva is the fire raid of the M2 series. This guide will go over the basic details of the fight as well as setups for fighting it. For more detailed mechanics information, please check the wiki.
Overview
Information
- JP Name: シヴァ
- HP: 430,000,000
- Defense: 12
- Blue Chest: 315k honors
Links
Drops
These are the most notable drops from this raid. Any unlisted weapons are safe to fodder.

- Mat for awakenings and for converting to Shiva Omega Anima.

- Highly useful mat for uncapping a large amount of weapons, summons, and characters.

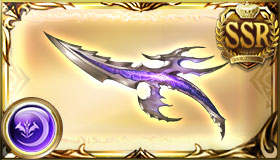
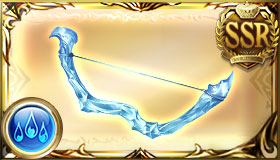
Visarga |
Massive fire DMG to a foe. (All allies gain DA Up and TA Up.)
Additional effect at 4★: |
|---|
|
Ironflame’s Stamina II
|
Big boost to fire allies’ ATK based on how high HP is |
|---|---|
|
Ironflame’s Aegis
|
Small boost to fire allies’ max HP |
- Big stamina and small HP.
- Stamina component is great for mixing up mod slots for FA or pre-M3 burst setups.
- Small HP is solid for when more HP is needed.

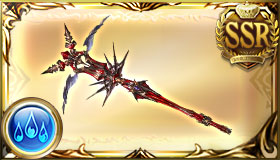
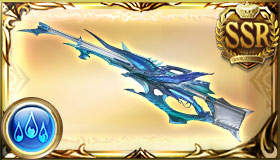
Rudra |
Massive Fire damage to a foe.Inflict DA Down and TA Down.All allies gain TA Up (15%, 3.5T). |
|---|
|
Ironflame’s Primacy
|
Medium boost to fire allies’ ATK / Medium boost to double attack rate for fire allies |
|---|---|
|
Ironflame’s Aegis
|
Small boost to fire allies’ max HP |
- Medium ATK, small HP, and medium DA.
- Great for HP for FA or HL.
Blue Chest Setups
Blue chests are awarded based on the amount of honors achieved in a raid maxing out at 99% chance at raid specific amount of honors: 315k in the case of Shiva. They contain the most desirable drops in a raid such as the weapon drops. When farming a raid, this is the chest you want to aim for. The typical strategy is to deal the blue chest amount and then moving onto the next raid. Below is a list of strategies on how to effectively and quickly achieve blue chests.
Beginner
These setups are oriented towards beginner players.
Relic Buster 
Relic Buster is the easiest way to achieve a blue chest. Limit Burst![]() All allies gain Charge Bar, C.A. DMG Boosted (1 time), and C.A. DMG Cap Boosted (1 time) based on number of Machine Cell.
All allies gain Charge Bar, C.A. DMG Boosted (1 time), and C.A. DMG Cap Boosted (1 time) based on number of Machine Cell.
(Consumes all Machine Cell.)
makes it simple to to perform a teamwide charge attack burst. It also supports a wide variety of characters and is very flexible grid wise. Weaker grids and characters may need to press additional buttons to reach the desired damage.

")


")


")


Rotation
- Turn 1
- Relic Buster

 Gain 5 Machine Cell (Max: 5) and restore HP (Healing cap: 2000).
(When HP is 50% or above: Also gain Strength (45%-15%, 3T).)
Level 30:
(When HP is below 50%: Also gain Jammed (30%-90%, 3T).) , All allies gain Charge Bar, C.A. DMG Boosted (1 time), and C.A. DMG Cap Boosted (1 time) based on number of Machine Cell.
(Consumes all Machine Cell.) 
- Relic Buster
- Turn 2
- Qilin

- Relic Buster
Gain 5 Machine Cell (Max: 5) and restore HP (Healing cap: 2000).
(When HP is 50% or above: Also gain Strength (45%-15%, 3T).)
Level 30:
(When HP is below 50%: Also gain Jammed (30%-90%, 3T).) ,
All allies gain Charge Bar, C.A. DMG Boosted (1 time), and C.A. DMG Cap Boosted (1 time) based on number of Machine Cell.
(Consumes all Machine Cell.)
- Qilin
Notes
- All characters can be subbed out for characters with Unworldly CAs or skill nukes after CA.
- Huanglong
 support also works.
 - Selene (Water)
 is the best MH for this for it’s strong Charge Attack and not needing to press RB1 on turn 2.
Rising Force
After aquiring a couple of Tyros Zithers, one can move onto using Rising Force to try a 1 turn setup. This is mainly thanks to Bonito’s ability to fill 200 charge on all allies with its first call. Like with Relic Buster, these setups are pretty flexible with character choice and makes 200 charge bar characters like Vajra
 highly valuable.


")


Rotation
- Turn 1
Notes
- All characters can be subbed out for characters with Unworldly CAs, 200 charge bar, or skill nukes after CA.
Advanced
These setups are oriented towards players with stronger grids and characters.
Manadiver 
The Chain of Falsehood grants teamwide double strike on charge attack. This allows for very quick and easy damage. While these setups are faster thanks to not having to deal with CA lockout, they are more restricted character wise requiring characters with guaranteed triple attacks to pull off.


")


Rotation
- Turn 1
- Warlock

 Convert caster’s HP to charge bar (3% charge bar for every 250 HP consumed, up to 100% charge bar).
(Consumes up to 50% of current HP.)
- Warlock
Notes
- Can use be any GTA character like Gwynne
 or Anne
 (with Belial (Summer)
 ).
).
MVP Setups
MVP chests are awarded to the player with the most honors in a raid as well as a possibility for other top scorers. While they have an additional weapon drop chance, it is advised to not aim for these especially as a a beginner due to the time it takes. However, if the raid is slow, it helps to join as higher damage output team so the raid can die.
Rising Force
After setting Rising Force up with Bonito the player can get a few turns out of CAs out of it. With Poseidon , a lot more charge attacks can be dealt in a row but otherwise it is easy to attack for a couple turns and deal a lot of deal.
Rotation
- Turn 1
- Turn 2
- Poseidon S2
 150% Water damage to all foes (Damage cap: ~340,000).
All allies gain ATK Boosted (Stackable) (5% (30% Max), Multiplier: Unique Stackable), DEF Boosted (Stackable) (5% (30% Max)), and Charge Bar (20%).
(Consumes all Tide Father lvls. Boost to activations based on number consumed [Max: 10 times].)
- Poseidon
- Turn 3
- Rising Force

 Elemental damage to a foe. Consume all Feedback on all allies.
(Boost to damage specs and charge bar based on number of Feedback consumed.)
- Rising Force
Rotation (without Poseidon)
- Turn 1
- Turn 2
- Turn 3
- Turn 4
- Rising Force
Elemental damage to a foe. Consume all Feedback on all allies.
(Boost to damage specs and charge bar based on number of Feedback consumed.)
- Rising Force
Notes
- Can replace any slot with another strong CA character like Mirin (Holiday)
 or Zeta (Water)
- Use alt rotation if replacing Poseidon.
Warlock
Normal attack focused setup using the Chain of Falsehood to have a turn of teamwide double strike. Warlock’s Ultimate Mastery skill Arcane Field![]() Gain Arcane Field (Multiplier: Perpetuity).(Effect ends when Arcane Field (Multiplier: Perpetuity) lvl is 7 or charge bar is insufficient at end of turn.)
is an excellent damage boost for grids that have issues with capping as well as providing TA to help those without GTA.
Gain Arcane Field (Multiplier: Perpetuity).(Effect ends when Arcane Field (Multiplier: Perpetuity) lvl is 7 or charge bar is insufficient at end of turn.)
is an excellent damage boost for grids that have issues with capping as well as providing TA to help those without GTA.


Rotation
- Turn 1
- Beelzebub

- Warlock
Convert caster’s HP to charge bar (3% charge bar for every 250 HP consumed, up to 100% charge bar).
(Consumes up to 50% of current HP.) Fill 3 charge diamonds on all foes.All allies gain Bonus DMG (20%, 3T), Charge Boost (30%), and 1 Elemental Crest (Hellfire CrestDeluge CrestWasteland CrestTyphoon CrestAurora CrestOblivion Crest).(Crest gained based on caster’s element.)
 Gain Arcane Field (Multiplier: Perpetuity).(Effect ends when Arcane Field (Multiplier: Perpetuity) lvl is 7 or charge bar is insufficient at end of turn.)
- Anre
 S2
S2 Gain Substitute (1T) and Counters on Dodge (3 times, 3T).
Level 95:
Also gain Fleeting Spark (280%, Multiplier: Assassin, 1T) - Gabriel
 S2
S2
- Beelzebub
Reference Video
Notes
- Characters can be replaced by any strong attacker or buffer.
- If replacing Gabriel, will need Lucio (Summer)’s
 skill 3 for Anre to have 100% TA.
Manadiver
Similar to Warlock Manadiver offers teamwide bonus damage and can wield Falsehood opus. Unlike Manadiver, it offers stronger output at less buttons making it a faster option. To emphasis the difference, the characters in the below setup are focused on speed over damage.
Rotation
- Turn 1
- Beelzebub
- Manadiver
Convert caster’s HP to charge bar (3% charge bar for every 250 HP consumed, up to 100% charge bar).
(Consumes up to 50% of current HP.) ,
Fill 3 charge diamonds on all foes.All allies gain Bonus DMG (20%, 3T), Charge Boost (30%), and 1 Elemental Crest (Hellfire CrestDeluge CrestWasteland CrestTyphoon CrestAurora CrestOblivion Crest).(Crest gained based on caster’s element.)
- Beelzebub
Reference Video
Notes
- Can replace with any GTA character.
Soldier
Hraesvelgr is a 150 gold moon that is as strong as it’s investment is high. Soldier setups rely on it’s high strength and power.

")


Rotation
- Turn 1
- Yatima
- Lucio (Summer) S1
 All allies gain Bonus Water DMG (20%, 3T) and Charge Bar (20%).
S3
All allies gain Bonus Water DMG (20%, 3T) and Charge Bar (20%).
S3 Grant a Water ally Bonus Water DMG (90%, 2T), Guaranteed TA (2T), 70% Fire Cut (2T), and Debuff Resistance Boosted (100%, 2T).
=>
Grant a Water ally Bonus Water DMG (90%, 2T), Guaranteed TA (2T), 70% Fire Cut (2T), and Debuff Resistance Boosted (100%, 2T).
=> 
- Soldier
 Gain Ammunition Belt (3T).
 Deal one-foe attacks until all bullets are consumed.
 Gain Guaranteed TA (1T) and instantly perform a normal attack without using up a turn. (Consumes bullets.)
Level 30:
Also gain Adversity (20%, 1T). - Payila
 S3
S3
- Yatima
Notes
- Payila can be subbed with:
- Catura (Holiday)

- T1: S2
 Caster and Water MC gain Double Strike (4T).
- T1: S2
- Erika

- T1: S1
 Another Water ally instantly performs a normal attack without using up a turn.
(Consumes Tactical Edge to end cooldown.) => Soldier
- T1: S1
- Catura (Holiday)
Full Auto
Full autoing M2 raids is generally pretty easy once you have a developed M2 grid. Both class and character options are pretty free.
This raid can be skipped removing the need to Full Auto solo it. In order to do so, you need to meet the following prerequisites.
- Solo the raid.
- Deal 30,000,000 damage in 1 turn.
- Fight the raid 100 times to get a new trophy.
The following FA strategies are geared towards players who still need to unlock the skips.
Lumberjack
Lumberjack is one of the safest classes to full auto with and the buffs provided by it also helps weaker grids to reach damage cap. Characters can easily be upgraded to better and stronger options.


Notes
- All characters can be easily replaced by others like Vajra, Poseidon, Kolulu (Summer)
 , Vane (SSR)
 , Lancelot (Grand)
 , or Feower
 among many others.
 - Finding a level 250 Lucifer
 as support will both make FA safer and faster.
Relic Buster
Relic Buster trades some saftey for more damage output and speed. Similar to Lumberjack, it can support a wide variety of characters so feel free to swap out characters, summons, and grids based on what is available.

")

Notes
- All characters can be easily replaced by others like Vajra, Poseidon, Kolulu (Summer), Vane (SSR), Lancelot (Grand), or Feower among many others.
- Finding a level 250 Lucifer as support will both make FA safer and faster.
Other Raids
Links to the other raids.
Raid Pages