
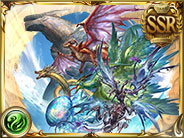
Europa is the water raid of the M2 series. This guide will go over the basic details of the fight as well as setups for fighting it. For more detailed mechanics information, please check the wiki.
Overview
Information
- JP Name: エウロペ
- HP: 380,000,000
- Defense: 12
- Blue Chest: 304k honors
Links
Drops
These are the most notable drops from this raid. Any unlisted weapons are safe to fodder.

- Mat for awakenings and for converting to Shiva Omega Anima.

- Highly useful mat for uncapping a large amount of weapons, summons, and characters.

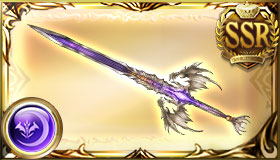
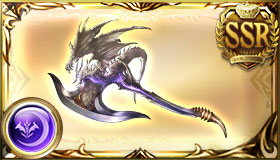
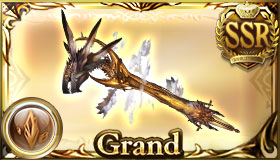
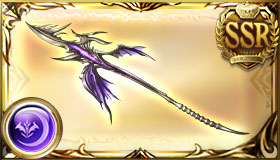
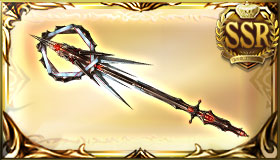
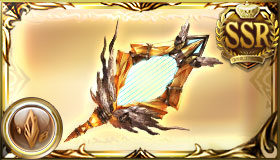
House of Thebes |
Massive Water damage to a foe. Inflict Fire ATK Lowered (10%). Gain Charge Boost (20%). |
|---|
|
Oceansoul’s Might
|
Medium boost to water allies’ ATK |
|---|---|
|
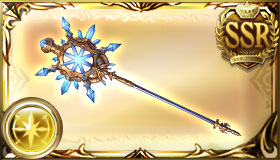
Oceansoul’s Sentence
|
Medium boost to water allies’ C.A. DMG and C.A. DMG cap |
- Medium ATK, medium CA damage, and medium CA cap.
- Excellent slot for CA teams.
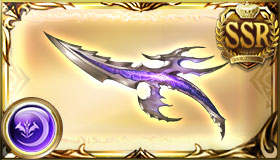
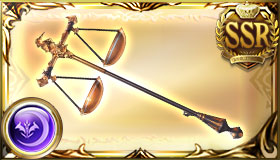
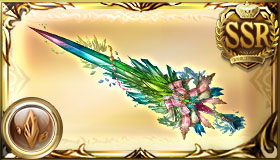
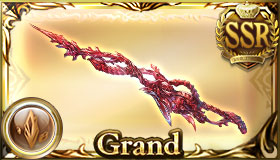
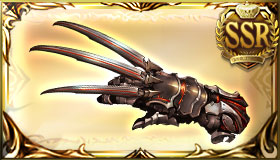
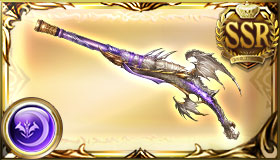
Euripus |
Massive water DMG to a foe (All allies gain DMG Supplemented and Normal Attack DMG Cap Boosted.)
Additional effect at 4★: |
|---|
|
Oceansoul’s Celere
|
Small boost to water allies’ ATK and critical hit rate |
|---|---|
|
Oceansoul’s Enmity II
|
Medium boost to water allies’ ATK based on how low HP is |
- Small ATK, small crit, medium enmity.
- Enmity crit weapon that is highly niche in usage.
Blue Chest Setups
Blue chests are awarded based on the amount of honors achieved in a raid maxing out at 99% chance at raid specific amount of honors: 304k in the case of Europa. They contain the most desirable drops in a raid such as the weapon drops. When farming a raid, this is the chest you want to aim for. The typical strategy is to deal the blue chest amount and then moving onto the next raid. Below is a list of strategies on how to effectively and quickly achieve blue chests.
Beginner
These setups are oriented towards beginner players.
Relic Buster 
Relic Buster is the easiest way to achieve a blue chest. Limit Burst
![]() All allies gain Charge Bar, C.A. DMG Boosted (1 time), and C.A. DMG Cap Boosted (1 time) based on number of Machine Cell.
All allies gain Charge Bar, C.A. DMG Boosted (1 time), and C.A. DMG Cap Boosted (1 time) based on number of Machine Cell.
(Consumes all Machine Cell.)
makes it simple to to perform a teamwide charge attack burst. It also supports a wide variety of characters and is very flexible grid wise. Weaker grids and characters may need to press additional buttons to reach the desired damage.


")


Rotation
- Turn 1
- Relic Buster
 Gain 5 Machine Cell (Max: 5) and restore HP (Healing cap: 2000).
(When HP is 50% or above: Also gain Strength (45%-15%, 3T).)
Level 30:
(When HP is below 50%: Also gain Jammed (30%-90%, 3T).) , All allies gain Charge Bar, C.A. DMG Boosted (1 time), and C.A. DMG Cap Boosted (1 time) based on number of Machine Cell.
(Consumes all Machine Cell.) 
- Relic Buster
- Turn 2
- Qilin
- Relic Buster
Gain 5 Machine Cell (Max: 5) and restore HP (Healing cap: 2000).
(When HP is 50% or above: Also gain Strength (45%-15%, 3T).)
Level 30:
(When HP is below 50%: Also gain Jammed (30%-90%, 3T).) ,
All allies gain Charge Bar, C.A. DMG Boosted (1 time), and C.A. DMG Cap Boosted (1 time) based on number of Machine Cell.
(Consumes all Machine Cell.)
- Qilin
Notes
- All characters can be subbed out for characters with Unworldly CAs or skill nukes after CA.
- Huanglong
 support also works.
 - Selene (Earth)
 is the best MH for this for it’s strong Charge Attack and not needing to press RB1 on turn 2.
Relic Buster 1T
A stronger grid can use Relic Buster to reach the blue chest honors in one turn. A large part of this is thanks to Eahta dealing a lot of CA damage.

")


Rotation
- Turn 1
- Beelzebub

- Relic Buster
Gain 5 Machine Cell (Max: 5) and restore HP (Healing cap: 2000).
(When HP is 50% or above: Also gain Strength (45%-15%, 3T).)
Level 30:
(When HP is below 50%: Also gain Jammed (30%-90%, 3T).) ,
All allies gain Charge Bar, C.A. DMG Boosted (1 time), and C.A. DMG Cap Boosted (1 time) based on number of Machine Cell.
(Consumes all Machine Cell.)
- Beelzebub
Notes
- With a stronger grid and the assistance of bubs call, you can easily hit mins in one turn with relic buster.
- All characters can be subbed out for characters with Unworldly CAs or skill nukes after CA.
Lumberjack
The Chain of Falsehood grants teamwide double strike on charge attack. This allows for very quick and easy damage. While these setups are faster thanks to not having to deal with CA lockout, they are more restricted character wise requiring characters with guaranteed triple attacks to pull off.


")


Rotation
- Turn 1
- Beelzebub
- Lumberjack

 Convert caster’s HP to charge bar (3% charge bar for every 250 HP consumed, up to 100% charge bar).
(Consumes up to 50% of current HP.) - Skull and Balurga
 S1
S1 Sacrifice 80% of caster’s current HP to gain Unchallenged (2T) and Jammed (40%-120%, 8T).
(When below 25% HP: Also gain Undying (Can’t be removed) (1 times).) S3 Gain Atar Bite (50%, Multiplier: Assassin, 1T).
(When below 25% HP: Also gain DMG Amplified (15%, Multiplier: Seraphic, 3T).)
- Beelzebub
Notes
- Skull and Balurga can be upgraded to Narmaya (Holiday)

- Others can be any other GTA character..
Advanced
These setups are oriented towards players with stronger grids and characters.
Rising Force 
The Chain of Falsehood grants teamwide double strike on charge attack. This allows for very quick and easy damage. It won’t have the damage output of the later setups, but for fast rooms it will get the job done.


")


Rotation
- Turn 1
- Beelzebub
- Rising Force
 Convert caster’s HP to charge bar (3% charge bar for every 250 HP consumed, up to 100% charge bar).
(Consumes up to 50% of current HP.)
- Beelzebub
Notes
- Any character can be replaced by any other GTA attacker.
- The Rising Force skill Pinch Harmonics
 6-hit, 100% elemental damage to all foes (Damage cap: ~135,000 per hit) and remove 1 buff.
(When MC has 10 or more buffs:
Auto-activates upon charge attacks.) can be cast for more damage, but requres Lobelia FLB , Mandrake (Summer)
 , and Belial (Summer)
 to pull off.
MVP
MVP chests are awarded to the player with the most honors in a raid as well as a possibility for other top scorers. While they have an additional weapon drop chance, it is advised to not aim for these especially as a a beginner due to the time it takes. However, if the raid is slow, it helps to join as higher damage output team so the raid can die.
Luchador
Earth has a lot of one turn assassin characters which pairs great with Luchador’s Tag Team
![]() All allies instantly perform a normal attack without using up a turn.
which gives a free set of teamwide normal attacks.
All allies instantly perform a normal attack without using up a turn.
which gives a free set of teamwide normal attacks.

")

Rotation
- Turn 1
- Beelzebub
- Narmaya (Holiday) S1
 Gain Butterfly Effect (80%, 2 turns
100% Charge Bar:
6 turns) and Counters on Dodge/DMG (200%, 2 times, 2 turns
100% Charge Bar:
6 turns).
(Consumes 30% of charge bar. Consumes 100% of charge bar to extend buff duration to 6 turns.) S3 Gain Substituted (All-Ally) (1T), Repel (99%, 1T), and Falling Mist (150%, Multiplier: Assassin, 1T).
- Mahira
 S3
S3 All allies gain ATK Up (25%, Multiplier: Normal, 3T) and Bonus Earth DMG (20%, 3T).
or Uriel
All allies gain ATK Up (25%, Multiplier: Normal, 3T) and Bonus Earth DMG (20%, 3T).
or Uriel S2
S2 S3
S3
- Luchador
 All allies instantly perform a normal attack without using up a turn.
- Beelzebub
Notes
- Sabrina can be replaced by any 0B attacker.
- Mahira/Uriel can be replaced by another teamwide buffer like Raziel (Summer)
 or Pholia (Yukata)
 or an attacker like Skull and Balurga.
 - Narmaya can be replaced by:
- Skull and Balurga
- T1: S1
Sacrifice 80% of caster’s current HP to gain Unchallenged (2T) and Jammed (40%-120%, 8T).
(When below 25% HP: Also gain Undying (Can’t be removed) (1 times).) S3
Gain Atar Bite (50%, Multiplier: Assassin, 1T).
(When below 25% HP: Also gain DMG Amplified (15%, Multiplier: Seraphic, 3T).)
- T1: S1
- Skull and Balurga
Nekomancer
Nekomancer is an advanced low button setup with some major character restrictions. But with them, you can deal lots of damage very quickly. This thanks to both the large bonus damage of Scratching Post
![]() All allies gain Triple Attack Rate Boosted (1 time) (100%) and Bonus DMG (1 time) (80%). Consumes 15 MP 1.
All allies gain Triple Attack Rate Boosted (1 time) (100%) and Bonus DMG (1 time) (80%). Consumes 15 MP 1.
(Can’t be recast.)
and the teamwide assassin from Pholia (Yukata)’s skill 1 Sea Spray's Mark![]() Inflict Sea Spray 2 (Accuracy: 100%, 2T) on all foes.
Inflict Sea Spray 2 (Accuracy: 100%, 2T) on all foes.
All Earth allies gain Salted Wound (Sea Spray) (30%, 1 times, Multiplier: Assassin, 1T) and Guaranteed TA (1T).
.

")
")
")
Rotation
- Turn 1
- Beelzebub
- Nekomancer
 All allies gain Triple Attack Rate Boosted (1 time) (100%) and Bonus DMG (1 time) (80%). Consumes 15 MP 1.
(Can’t be recast.) - Raziel (Summer) S2

- Pholia (Yukata) S1
 Inflict Sea Spray 2 (Accuracy: 100%, 2T) on all foes.
All Earth allies gain Salted Wound (Sea Spray) (30%, 1 times, Multiplier: Assassin, 1T) and Guaranteed TA (1T).
- Beelzebub
Notes
- Raziel can be Jessica (Yukata)
 or Mahira.
Glorybringer
Glorybringer can do large damage in one turn with the 150 gold moon weapon Hrunting
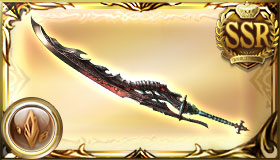 . This is thanks to its Awaken ability from Glory Arts
![]() Call forth the main weapon’s hidden power.(Casts main weapon’s Awaken skill.
Call forth the main weapon’s hidden power.(Casts main weapon’s Awaken skill.
Gain maximum Energized stacks.)
granting one turn assassin combined with Mastery’s Edge![]() Sabre- and katana-specialty allies gain Double Strike (1T).
Sabre- and katana-specialty allies gain Double Strike (1T).
(Consumes 15 Energized (icon)Energy.)
for teamwide double strike.

Rotation
- Turn 1
- Beelzebub
- Glorybringer
 Call forth the main weapon’s hidden power.(Casts main weapon’s Awaken skill.
Gain maximum Energized stacks.) Sabre- and katana-specialty allies gain Double Strike (1T).
(Consumes 15 Energized (icon)Energy.) - Narmaya (Holiday) S1
Gain Butterfly Effect (80%, 2 turns
100% Charge Bar:
6 turns) and Counters on Dodge/DMG (200%, 2 times, 2 turns
100% Charge Bar:
6 turns).
(Consumes 30% of charge bar. Consumes 100% of charge bar to extend buff duration to 6 turns.) S3
Gain Substituted (All-Ally) (1T), Repel (99%, 1T), and Falling Mist (150%, Multiplier: Assassin, 1T).
- Beelzebub
Notes
- Can replace non Narmaya characters with other sword or katana characters like Threo
 or Aglovale and Tor
 .
.
Full Auto
Full autoing M2 raids is generally pretty easy once you have a developed M2 grid. Both class and character options are pretty free.
This raid can be skipped removing the need to Full Auto solo it. In order to do so, you need to meet the following prerequisites.
- Solo the raid.
- Deal 30,000,000 damage in 1 turn.
- Fight the raid 100 times to get a new trophy.
The following FA strategies are geared towards players who still need to unlock the skips.
Characters
Here is a quick overview of characters that are useful for Full Auto.

")
")


")
")


")


")
")


Lumberjack
Lumberjack is one of the safest classes to full auto with and the buffs provided by it also helps weaker grids to reach damage cap. Characters can easily be upgraded to better and strong options.


Notes
- All characters can be easily replaced by others like Satyr (Earth), Cidala
 , Amelia
 , Lennah (Earth), Adam
 , Cucouroux (Halloween), Sara
 , or Mahira among many others.
Relic Buster
Relic Buster trades some saftey for more damage output and speed. Similar to Lumberjack, it can support a wide variety of characters so feel free to swap out characters, summons, and grids based on what is available.
")
")
Notes

Other Raids
Links to the other raids.
Raid Pages


One response to “Europa”
Hello !
I post here just to say a gigantic THANK YOU for your guides.
It makes me progress far from where I was just two weeks ago.
Again, thank you !