This page will overgo the basics of the game mode Arcarum and setups for dealing with the various fights.
Arcarum Pages
About
Arcarum: The World Beyond is a permanent game mode. In order to unlock it, you will need to clear the quest Chapter 30 (44/65) Quest: Inchoate World which is locked behind completing Chapter 44 of the Main Story.
The mode drops materials that are used to unlock and upgrade Arcarum Summons and later Arcarum Evokers.
Mechanics
In order to run Arcarum, an Arcarum badge will need to be spent. You get one badge a day with Magfest typically increasing this to two badges a day. They are capped at 10 initially but upgrades can be purchased to increase this cap to 90.
There are three zones in Arcarum. Each one has at least three Arcarum associated with it. The routes are mostly the same but with some different enemy spawns.

Starting an expedition you’ll be greeted to a map. To navigate it, you’ll need to spend a resource called TP. You don’t need to worry about it about it however. On Normal it starts at 120 and gets reduced to 70 at the higher difficulties. This is more than enough to fully explore each map and kill each enemy. Its recommended to do fully clear maps for more opportunities for mat drops. If a fight is proving too difficult, you can retreat that fight with no penalty other than the TP lost from fighting it.

Each stage will have an objective to be able to clear it. This will be any of the following:
- Defeat a specific enemy.
- Defeat all enemies.
- Destroy every Sephira Spirethorn.
- Defeat the boss.
- No objective.
The standard enemies on the map are easily defeated. Below will be a few setups on how to clear them quickly.
Sometimes when opening a chest, you’ll have to fight a special enemy called a mimic instead. Mimics are low health and are killed with ease.
At Stage 3-3 and 6-3, you will need to fight a miniboss called a Puppet. These have much more health than a standard enemy but pose little challenge. The puppet element will depend on the route. The element the puppet can be will depend on the route.
| Point Aquila | Fire Earth |
| Point Bellator | Wind Water |
| Point Celsus | Earth Wind |
And then at 9-3 you will fight the boss of the Zone. It will randomly be one of the Arcarum summons along a given Zone. There is an item in the shop called the Globe of the Starways that lets you choose which boss on the route you fight. When aiming for a specific Arcarum summon or evoker, it is highly recommended to use this to change boss. Defeating them provides a large amount of ideans and astras.
| Point Aquila | The Hanged Man The Devil The Sun |
| Point Bellator | Justice The Moon Judgement |
| Point Celsus | Death Temperance The Tower The Star |
After clearing 9-3, you will be returned back to 1-1.
Clearing each route will unlock the next difficulty. Each new difficulty increases the HP of enemies. Hard lowers TP to 70. Extreme adds bonus objectives that occur randomly that will depend on which route you are on. Clearing the bonus objective will spawn a special enemy that drops a ton of valuable loot.
Once you clear a route, you unlock Fast Expedition. This lets you skip every stage with the exception of still needing to clear 9-3 manually. Fast expedition does not net EXP and has lower drops than manual clears. However, the amount lost is typically not worth min maxing for most players. This is further mitigated by the follow up mode Sandbox letting you farm the same drops but without any time gates.
Setups
Now onto setups for the various fights.
Mobs
The majority of sanbox fights are very easy fights against basic mobs. Any team shouldn’t have troubles defeating them. Below I’ll cover a few of the tactics that are useful for quickly clearing them.
Threo
Threo ’s skill 3 Ground Zero
![]() Sacrifice 99% of caster’s current HP to deal plain damage to all foes (Damage cap: ~820,000).
Sacrifice 99% of caster’s current HP to deal plain damage to all foes (Damage cap: ~820,000).
Damage dealt is based on HP consumed.
Gain Shield (3000).
Level 95:
Also inflict Earth DEF Lowered (25%, Accuracy: ≥100%, 180s).
Damage cap increased to ~1,230,000.
Level 130:
Damage increased and damage cap increased to ~2,040,000.
When HP is below 25%: Also gain Tri-Slash (1T).
is a large AoE plain nuke. It makes trashing waves very easily especially now that you can disable skills to FA into it.
Threo’s nuke is dependant on her HP. Early game, you want to slot whatever HP weapons you can get into your grid to get closer to her max damage. With stronger, later game grids, you can focus more on skill cap because her nuke is affected by cap increases. Her nuke also becomes stronger between MLB, FLB, and Transcendance.
One major restriction with using Ground Zero is that Extreme difficulty reduces plain damage by 50% making it difficult to kill the chunkier standard mobs. However it gets most of the way so another damage skill like Twin Coil![]() 2-hit, 200% elemental damage to all foes (Damage cap: ~415,000 per hit).
or Decimate
2-hit, 200% elemental damage to all foes (Damage cap: ~415,000 per hit).
or Decimate![]() 5-hit, 100% superior elemental damage to a foe (Damage cap: ~81,000 per hit).
5-hit, 100% superior elemental damage to a foe (Damage cap: ~81,000 per hit).
When an auxiliary weapon is equipped: Number of hits doubles to 10.
can finish it off.
Rotation
- Turn 1
- Threo

 Sacrifice 99% of caster’s current HP to deal plain damage to all foes (Damage cap: ~820,000).
Damage dealt is based on HP consumed.
Gain Shield (3000).
Level 95:
Also inflict Earth DEF Lowered (25%, Accuracy: ≥100%, 180s).
Damage cap increased to ~1,230,000.
Level 130:
Damage increased and damage cap increased to ~2,040,000.
When HP is below 25%: Also gain Tri-Slash (1T). 
- Threo
Summon Calls
One of the best and most flexible setups are summon call setups. The main requirement is having either Beelzebub or Triple Zero
 . These two summons have very high damage for a summon that can easily kill any standard sandbox mob with just a call. No characters are required which makes slotting in drop rate characters like Tien
 or Richard (SR)
 a breeze. Grid wise, slot in whatever can raise skill cap or general cap more to increase the damage of the summon call.
Rotation
- Turn 1
Decimate
The last strat is an older one but still is a great options for those without either summon. Decimate![]() 5-hit, 100% superior elemental damage to a foe (Damage cap: ~81,000 per hit).
5-hit, 100% superior elemental damage to a foe (Damage cap: ~81,000 per hit).
When an auxiliary weapon is equipped: Number of hits doubles to 10.
is very strong skill nuke for this thanks always having elemental advantage. It also has a 10 hit count when used with Chrysaor which can be futher raised to 12 with the CCW Proximo
 . Note that upgrading Proximo into Wasserspeier causes it to lose the hit count increase.
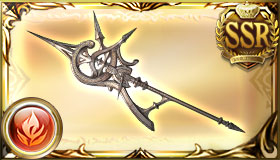
Grid wise you want to max skill damage and supp. In the blow example, you see 5 Ewiyar’s Beaks . This is due to the low HP of the enemies requiring more copies of a weapon to max supp. Up to 3 beaks can be replaced with Mandjets
 depending what you have access to.
Rotation
- Turn 1
- Chrysaor
 Decimate
 5-hit, 100% superior elemental damage to a foe (Damage cap: ~81,000 per hit).
When an auxiliary weapon is equipped: Number of hits doubles to 10.
- Chrysaor
Puppet
At 3-3 and 3-6 you’ll fight the a set of mini bosses known as Puppets. They will be Fire, Water, Earth, or Wind depending on what route you are on.
Early game, they will be may take a few turns to deal with, but eventually they’ll be very easy to dispatch.
Relic Buster
Relic Buster is generally the easiest early game way to deal with this thanks to its ability to provide 100% bar to the team turn 1. Use whatever characters you have available and add buttons as neccesary. It may take a few turns but won’t be much of challenge.
Rotation
- Turn 1
- Relic Buster

 ,
,  All allies gain Charge Bar, C.A. DMG Boosted (1 time), and C.A. DMG Cap Boosted (1 time) based on number of Machine Cell.
(Consumes all Machine Cell.) , Inflict ATK Down (25%, Accuracy: 80%, 180s) and DEF Down (25%, Accuracy: 80%, 180s) on all foes.

- Relic Buster
Relic Buster Advanced
With a stronger grid, the initial Relic Buster burst is enough to dispatch it. Characters can be anyone with large CAs or skill damage nukes.
Rotation
- Turn 1
- Relic Buster

 ,
,  All allies gain Charge Bar, C.A. DMG Boosted (1 time), and C.A. DMG Cap Boosted (1 time) based on number of Machine Cell.
(Consumes all Machine Cell.) 
- Relic Buster
Bubs
Beelzebub’s call is strong enough to deal most of the damage of the puppet. After that it is very to kill the puppet with autos from MC alone or a couple characters.
Rotation
- Turn 1
Triple Zero
Triple Zero’s deals stupidly high damage with its call. It’s enough to easily take out a puppet. Run whatever element gives you the most skill cap or general cap up and triple zero should clear easily.
Rotation
- Turn 1
9-3 Boss
9-3 will have you fight one of the Arcarum of that route. These will be the hardest fights of this mode. That said for the most part they are not that challenging with one major exception.
Relic Buster
Like with the puppets, starting off with the strong burst from Relic Buster will make clearing the fight easier. It might also be wise to bring Tactical Shield![]() All allies gain Shield, Veil, and Armored (20%, 3T).
All allies gain Shield, Veil, and Armored (20%, 3T).
(Boost to Shield’s specs based on number of Machine Cell.)
if you need more help with survivability.
Rotation
- Turn 1
- Relic Buster

 ,
,  All allies gain Charge Bar, C.A. DMG Boosted (1 time), and C.A. DMG Cap Boosted (1 time) based on number of Machine Cell.
(Consumes all Machine Cell.) , Inflict ATK Down (25%, Accuracy: 80%, 180s) and DEF Down (25%, Accuracy: 80%, 180s) on all foes.

- Relic Buster
While each boss has its own mechanics that may prove an annoying, the fight against the Dark boss Death will prove most challenging. She has two main special mechanics. The first is she starts with a 90% cut that lowers by 20% every time an ally gets knocked out. The second is an instant wipe at 13 turns.
Luna is a side story character who is great to get around this. She can inflict instant death on an ally with her skill 1. Additionally being off element, she’ll likely die first or second turn. This will drop the defense cut by 40% to a much more managable 50%. After her death you can begin the relic buster burst
Rotation
- Turn 1
- Luna
 Soul Conversion
 Knock out another ally.
=>

- Luna
- Turn 2
- Relic Buster

 ,
,  All allies gain Charge Bar, C.A. DMG Boosted (1 time), and C.A. DMG Cap Boosted (1 time) based on number of Machine Cell.
(Consumes all Machine Cell.) , Inflict ATK Down (25%, Accuracy: 80%, 180s) and DEF Down (25%, Accuracy: 80%, 180s) on all foes.

- Relic Buster
Relic Buster Advanced
Like with Puppets, with a stronger grid the Arcarum bosses can be dealt with easily in one turn. This also includes Death though you may need to press some extra buttons for it.
Rotation
- Turn 1
- Relic Buster

 ,
,  All allies gain Charge Bar, C.A. DMG Boosted (1 time), and C.A. DMG Cap Boosted (1 time) based on number of Machine Cell.
(Consumes all Machine Cell.) 
- Relic Buster
Bubs
Another way to deal with the bosses is the typical call bubs and attack setup. Unlike with the puppets, you’ll need some GTA or auto nuke characters to help deal with the remaining HP. Alternatively, Triple Zero can be used instead of bubs.
Rotation
- Turn 1


