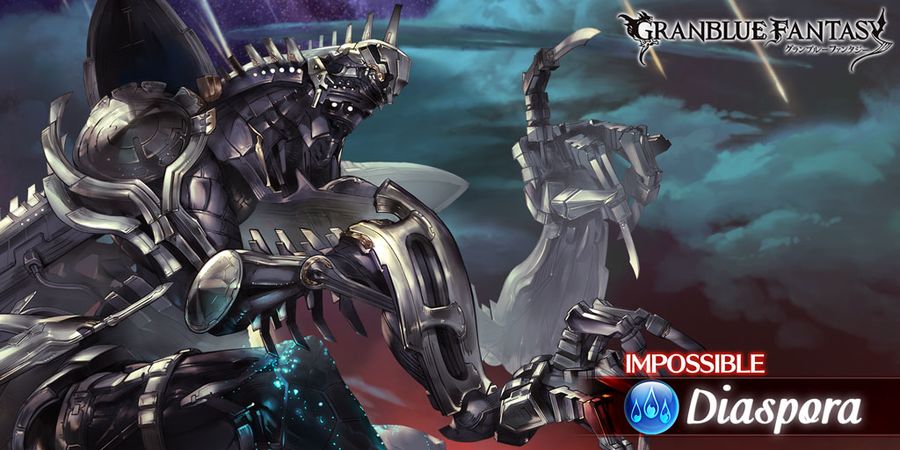
Diaspora is the water raid of the Revan series. This guide will go over the basic details of the fight as well as setups for fighting it. For more detailed mechanics information, please check the wiki.
Overview
Information
- JP Name: ディアスポラ
- HP: 2,000,000,000
- Defense: 20 > 30 (Phase 2)
- Blue Chest: 4m honors
Links
General Strategy
Entry trigger deals ~50,000 water damage and knocks out all non Earth allies.
Diaspora’s main gimmick is that the raid starts by building stacks based on the type of damage dealt to the boss and once one type is maxed it will gain a buff to punish that kind of damage. All runs should max the ougi stacks Gamma Resistance (Analysis) because the other two buffs are way too punishing for every kind of setup. If in a coop room, make sure to not max another set of stacks otherwise it is raid over.
Diaspora raids will typically contain 1 Kengo to max the ougi stacks and 4-5 non ougi damage setups. If joining before the stacks are maxed, avoid ougi damage so the host can hit 4m honors.
During this first Phase, there will be two other specials to deal with. The normal diamond special Erasure Command: Subverse will inflict two debuiffs and give Diaspora two buffs. This will randomly either have a cancel of 37 hits or 11 debuffs. Your setup will determine which is the easier cancel. Debuff summons like Mandrake (Summer) are very useful for this. Although the boss is immuned to delay, ougi clear skills and summons like Typhon
 can still be used for diamond clear.
The other Repair Command: Reinnervate occurs every 6 turns. It restores 30m hp and clears two debuffs. It requires 24,411,017 damage to cancel.
Once the stacks are maxed there will be the omen Emergency Repair System which heals the boss every turn until 97 total hits are achieved. Joining pubs will start you at this and will typically be canceled in 2-4 turns depending on characters. The host can also guard spam additional turns to ensure everyone crosses blue chest if needed for 6 man rooms.
After leaving this section, it casts one more trigger Erasure Order: Autophagon which is a blast of wind damage that inflicts the debuiff Autophagon to all allies lowering their attack and defense more every turn that passses.
In the second phase, the full diamond special gets upgraded to Erasure Order: Planet Eclipser which does an additional debuff and grants one more buff as well inflicting wind damage instead. However it still has the same cancel requirements.
30% and 10% has the trigger Final Order: Nuclear Option which deals sizable wind damage and 10,111 plain damage to everyone based on their number of debuffs. It requires 30,110,141 damage to cancel so prepare accordingly.
Drops
These are the most notable drops from this raid. Any unlisted weapons are safe to fodder.

- Mat for uncapping Revan weapons and awakenings.
Rip and Terror |
Massive water DMG to a foe (Gain Critical Up.)
Additional effect at 4★: Also gain ATK Sharply Boosted. |
|---|
|
Blade’s Wrath
|
Boost to ATK, max HP, and multiattack rate based on how many katanas are equipped. |
|---|---|
|
Snowfall’s Quenching
|
Supplement Water allies’ C.A. DMG based on how high their HP is. |
|
Snowfall’s Ascendancy
|
10% boost to Water allies’ Special C.A. DMG Cap. |
- Blade Voltage, 600k stamina CA supp, and 10% special CA cap.
- Blade voltage provides 2% EX ATK, 1% HP, and 1% MA per Katana in grid.
- Great CA weapon thanks to its CA supplemental and special CA cap.
- Excellent source of HP.
- Reccomended to start with two defense awakening to assist with hard content.
Strike and Shatter |
Massive water DMG to a foe / Tank-and-Counter effect to water allies (1 hit)
Additional effect at 4★: |
|---|
|
Cobalt Enforcement
|
Boost to Water allies’ ATK and DEF (Activates when either Water Omega or Water Optimus weapon skills have a boost of 280% or above) |
|---|---|
|
Zenith Art: Water
|
Boost to Water allies’ skill DMG cap and C.A. DMG cap |
- Source of normal cap up and skill cap.

- Extremely rare item used for New World Foundation weapon ULBs and summon transcendence
Hosting
Unlike other raids, hosting for this raid has a different job. Before pubbing the raid, the ougi stacks should be maxed ougi. This makes the raid faster for those joining and is the general ettiquete and expectation from players. It also allows the host to safely and easily get a blue chest.
Kengo 

Reference
Notes
- General process is to hit Monika (Valentine)’s
 skill Wind of Love’s Spark
 All allies gain Charge Bar (30%) and Charge Bar Gain Boosted (20%, 3T).
(When Monika has 12 or more buffs: All allies also gain C.A. DMG Boosted (1 time) (80%) and C.A. DMG Cap Boosted (1 time) (20%).) every turn and cycle Eahta and Satyr buffs as they go off cooldown. - Options for replacing Monika include Benjamin
 , Galleon
 , Anthuria (Holiday)
 , Caim
 , and Razia
 .
. - Typhon
 can make the process easier by removing the need to worry about the debuffs from tanking the specials.
Full Auto
Kengo 10T 
Reference
Onmyoji 6T 
Reference
Notes
Kengo 3T 
Reference
Rising Force 2T 
Reference
ちなみにディアスポラくん自発奥義100も今は2ターン30秒です
— 花庭ぱずる@悲鳴絶叫系Vtuber🌷🧩 (@hananiwapuzzle) January 28, 2026
よい時代になりましたね! pic.twitter.com/BnsFKn1YVu
Blue Chest
Blue chests are awarded based on the amount of honors achieved in a raid maxing out at 99% chance at a raid specific amount of honors: 4m in the case of Revan raids. They typically contain the most desirable drops in a raid such as the weapon drops. When farming a raid, this is the chest you want to aim for. The typical strategy is to deal the blue chest amount and then moving onto the next raid. Below is a list of strategies on how to effectively and quickly achieve blue chests.
Robin Hood
Robin Hood is the lowest requirement class for this raid thanks to it having both lots of debuffs and hit counts for dealing with triggers. This also allows for a lot of character flexibility as long as they have high hit counts or lots of debuffs. In addition, the UM skill Rapid Nocking
![]() Nock and draw a mystic arrow.(Skill effect changes based on the arrow selected.)
is an excellent option available to make cancelling triggers even easier.
Nock and draw a mystic arrow.(Skill effect changes based on the arrow selected.)
is an excellent option available to make cancelling triggers even easier.
Basic 
References
Reference Video
Reference Video: Gorilla
Notes
- Celeste can be upgraded to any summon with more debuffs like Mandrake (Summer)
 , Sariel (Holiday)
 , or Thor
 .
. - Chicken or Soriz can be subbed for Cucouroux (Halloween)
 , Metera (Summer)
 , or Baal
 .
. - Running Gorilla
 support with extra gorilla in summons will increase damage per turn and reduce damage taken.
 - Replace Return of the Fox
 End cooldown for caster’s other skills.
Gain Charge Boost (50%). with Rapid Nocking Nock and draw a mystic arrow.(Skill effect changes based on the arrow selected.)
if available.
5T 
Rotation
- Turn 1
- Robin Hood

 Nock and draw a mystic arrow.(Skill effect changes based on the arrow selected.)
=> Sweeping Arrow
 - Illnott (Summer)
 S
S 500% Earth damage to a foe (Damage cap: ~730,000).
Inflict Delay (Accuracy: 100%) and remove 1 buff.
(Additional effect when 1 Piece is consumed: Activates twice.) , S2 All allies gain TA Up (100%, 4T) and Bonus Earth DMG (30%, 4T).
Inflict Shorted (4T) on all allies.
(Consumes 100% of all allies’ charge bars.) , S3 Inflict Fluorescence 5 (Accuracy: 200%, 5T) on all foes.
(Can’t recast.)  =>
=> 

- Robin Hood
- Turn 2
- Turn 3
- Cucouroux (Halloween)
 S1
S1 6-hit, 100% Earth damage to random foes (Damage cap: ~60,000 per hit).
Inflict Debuff Resistance Lowered (Stackable) (10% (30% Max), Accuracy: 100%, 180s) and Earth Lowered (Stackable) (10% (30% Max), Accuracy: 100%, 180s) on all foes.
Gain Covering Fire (3T). - Caim
 S2
S2 Beginning of Joker: Copy an ally’s skill.
(Skill changes to End of Joker upon casting.)
End of Joker: All Earth allies gain ATK Up (30%, Multiplier: Normal, 3T), DEF Up (30%, 3T), TA Up (20%, 3T), Revitalize (500 HP or 10% charge bar, 3T), Shield (2000, 3T), DMG Cap Boosted (10%, 3T), Uplift (15%, 3T), Hype (1-4 stacks, 3T), and Veil.
(Skill changes to Beginning of Joker upon casting.) - Uriel


- Cucouroux (Halloween)
- Turn 3
- Galleon

- Mammoth

- Caim
 S1
S1 All Earth allies gain Double Deal (1 times).
(Can’t recast.) , S4 Skill effect changes based on the card selected.
(Can only be used after The Fool Upright activates.) => Beatdown - Vikala (Summer)
 S2
S2 Other Earth allies gain Double Strike (1T).
Self-inflict C.A. Sealed (Can’t be removed) (3T). 
- Galleon
- Turn 7
- Vikala (Summer)
 S2
S2 Other Earth allies gain Double Strike (1T).
Self-inflict C.A. Sealed (Can’t be removed) (3T). - Caim
 S4
S4 Skill effect changes based on the card selected.
(Can only be used after The Fool Upright activates.) => Beatdown 
- Vikala (Summer)
Reference
Notes
- Burst variant of RH setup.
- Illnott is killed off on turn 2.
Lumberjack
2T 
Rotation
- Turn 1
- Lumberjack

 Gain Woodcutter’s Song (3T).
Level 30:
Woodcutter’s Song (3T) duration increased to 4 turns. All allies gain DMG Amplified (20%, 3T).
From 2nd cast onward: All allies also gain Bonus Damage (20%, 3T).
From 3rd cast onward: All allies also gain Double Strike (1T). 3-hit, 150% elemental damage to all foes (Damage cap: ~185,000 per hit).All allies gain Double Attack Rate Boosted (Stackable) (10% (50% Max)), Triple Attack Rate Boosted (Stackable) (5% (25% Max)), and DMG Cap Boosted (Stackable) (2% (10% Max)).
(While Woodcutter’s Song is in effect: Auto-activates upon normal attacks.) - Raziel (Summer)
 S1
S1 S2
S2
- Olivia
 S1
S1 S2
S2 S3
S3
- Uriel
 S2
S2 S1
S1 S3
S3
- Qilin


- Lumberjack
- Turn 1
- Beelzebub

- Mammoth

- Lumberjack

 Gain Woodcutter’s Song (3T).
Level 30:
Woodcutter’s Song (3T) duration increased to 4 turns. All allies gain DMG Amplified (20%, 3T).
From 2nd cast onward: All allies also gain Bonus Damage (20%, 3T).
From 3rd cast onward: All allies also gain Double Strike (1T). Convert caster’s HP to charge bar (3% charge bar for every 250 HP consumed, up to 100% charge bar).
(Consumes up to 50% of current HP.) 3-hit, 150% elemental damage to all foes (Damage cap: ~185,000 per hit).All allies gain Double Attack Rate Boosted (Stackable) (10% (50% Max)), Triple Attack Rate Boosted (Stackable) (5% (25% Max)), and DMG Cap Boosted (Stackable) (2% (10% Max)).
(While Woodcutter’s Song is in effect: Auto-activates upon normal attacks.) - Raziel (Summer)
 S1
S1
- Olivia
 S1
S1 S3
S3 S2
S2 S3
S3
- Uriel
 S2
S2 S1
S1 S3
S3
- Raziel (Summer)
 S3
S3

- Beelzebub
Reference
Notes
- Requires 6 red skills and 2 yellow skills from the frontline saccs. If needing to replace a character, make sure to hit those totals from non Earth characters.
2T No Raziel 
Rotation
- Turn 1
- Uriel
 S2
S2 S1
S1 S3
S3
- Caim
 S4
S4 Skill effect changes based on the card selected.
(Can only be used after The Fool Upright activates.) => Delay Act - Lumberjack

 All allies gain DMG Amplified (20%, 3T).
From 2nd cast onward: All allies also gain Bonus Damage (20%, 3T).
From 3rd cast onward: All allies also gain Double Strike (1T). 3-hit, 150% elemental damage to all foes (Damage cap: ~185,000 per hit).All allies gain Double Attack Rate Boosted (Stackable) (10% (50% Max)), Triple Attack Rate Boosted (Stackable) (5% (25% Max)), and DMG Cap Boosted (Stackable) (2% (10% Max)).
(While Woodcutter’s Song is in effect: Auto-activates upon normal attacks.) - Olivia
 S2
S2 S3
S3
- Qilin


- Uriel
- Turn 2
- Beelzebub

- Mammoth

- Olivia
 S2
S2
- Caim
 S1
S1 All Earth allies gain Double Deal (1 times).
(Can’t recast.) - Lumberjack

 All allies gain DMG Amplified (20%, 3T).
From 2nd cast onward: All allies also gain Bonus Damage (20%, 3T).
From 3rd cast onward: All allies also gain Double Strike (1T). All allies gain DMG Amplified (20%, 3T).
From 2nd cast onward: All allies also gain Bonus Damage (20%, 3T).
From 3rd cast onward: All allies also gain Double Strike (1T). - Caim
 S4
S4 Skill effect changes based on the card selected.
(Can only be used after The Fool Upright activates.) => Beatdown S3 Skill effect changes based on the type of skill that is first used by a main ally.
S2
 Beginning of Joker: Copy an ally’s skill.
(Skill changes to End of Joker upon casting.)
End of Joker: All Earth allies gain ATK Up (30%, Multiplier: Normal, 3T), DEF Up (30%, 3T), TA Up (20%, 3T), Revitalize (500 HP or 10% charge bar, 3T), Shield (2000, 3T), DMG Cap Boosted (10%, 3T), Uplift (15%, 3T), Hype (1-4 stacks, 3T), and Veil.
(Skill changes to Beginning of Joker upon casting.) S4 Skill effect changes based on the card selected.
(Can only be used after The Fool Upright activates.) => Extra Turn S2 Beginning of Joker: Copy an ally’s skill.
(Skill changes to End of Joker upon casting.)
End of Joker: All Earth allies gain ATK Up (30%, Multiplier: Normal, 3T), DEF Up (30%, 3T), TA Up (20%, 3T), Revitalize (500 HP or 10% charge bar, 3T), Shield (2000, 3T), DMG Cap Boosted (10%, 3T), Uplift (15%, 3T), Hype (1-4 stacks, 3T), and Veil.
(Skill changes to Beginning of Joker upon casting.) S3 Skill effect changes based on the type of skill that is first used by a main ally.
- Olivia
 S3
S3 S3
S3

- Beelzebub
Reference
3T 
Rotation
- Turn 1
- Mammoth

- Lumberjack

 Gain Woodcutter’s Song (3T).
Level 30:
Woodcutter’s Song (3T) duration increased to 4 turns. All allies gain DMG Amplified (20%, 3T).
From 2nd cast onward: All allies also gain Bonus Damage (20%, 3T).
From 3rd cast onward: All allies also gain Double Strike (1T). - Uriel
 S2
S2
- Olivia
 S2
S2
- Narmaya (Holiday)
 S1
S1 Gain Butterfly Effect (80%, 2 turns
100% Charge Bar:
6 turns) and Counters on Dodge/DMG (200%, 2 times, 2 turns
100% Charge Bar:
6 turns).
(Consumes 30% of charge bar. Consumes 100% of charge bar to extend buff duration to 6 turns.) 
- Mammoth
- Turn 2
- Olivia
 S3
S3
- Narmaya (Holiday)
 S2
S2 8-hit, 100% Earth damage to a foe (Damage cap: ~65,000 per hit).
Restore caster’s HP (Healing cap: 1500).
Raise Eight Ways (Multiplier: Perpetuity) lvl by 2. - Lumberjack

 Convert caster’s HP to charge bar (3% charge bar for every 250 HP consumed, up to 100% charge bar).
(Consumes up to 50% of current HP.) 3-hit, 150% elemental damage to all foes (Damage cap: ~185,000 per hit).All allies gain Double Attack Rate Boosted (Stackable) (10% (50% Max)), Triple Attack Rate Boosted (Stackable) (5% (25% Max)), and DMG Cap Boosted (Stackable) (2% (10% Max)).
(While Woodcutter’s Song is in effect: Auto-activates upon normal attacks.) - Uriel
 S1
S1 S3
S3
- Olivia
 S1
S1
- Narmaya (Holiday)
 S3
S3 Gain Substituted (All-Ally) (1T), Repel (99%, 1T), and Falling Mist (150%, Multiplier: Assassin, 1T).
- Qilin

- Lumberjack

 All allies gain DMG Amplified (20%, 3T).
From 2nd cast onward: All allies also gain Bonus Damage (20%, 3T).
From 3rd cast onward: All allies also gain Double Strike (1T). 
- Olivia
- Turn 3
- Beelzebub

- Lumberjack

 Convert caster’s HP to charge bar (3% charge bar for every 250 HP consumed, up to 100% charge bar).
(Consumes up to 50% of current HP.) 3-hit, 150% elemental damage to all foes (Damage cap: ~185,000 per hit).All allies gain Double Attack Rate Boosted (Stackable) (10% (50% Max)), Triple Attack Rate Boosted (Stackable) (5% (25% Max)), and DMG Cap Boosted (Stackable) (2% (10% Max)).
(While Woodcutter’s Song is in effect: Auto-activates upon normal attacks.) - Uriel
 S2
S2 S1
S1 S3
S3
- Olivia
 S2
S2 S3
S3
- Narmaya (Holiday)
 S3
S3 Gain Substituted (All-Ally) (1T), Repel (99%, 1T), and Falling Mist (150%, Multiplier: Assassin, 1T).

- Beelzebub
Reference
Sumaibito
1T 
Rotation
- Turn 1
- Mammoth

- Raziel (Summer)
 S1
S1 S2
S2
- Olivia
 S2
S2
- Threo
 S3
S3 Sacrifice 99% of caster’s current HP to deal plain damage to all foes (Damage cap: ~820,000).
Damage dealt is based on HP consumed.
Gain Shield (3000).
Level 95:
Also inflict Earth DEF Lowered (25%, Accuracy: ≥100%, 180s).
Damage cap increased to ~1,230,000.
Level 130:
Damage increased and damage cap increased to ~2,040,000.
When HP is below 25%: Also gain Tri-Slash (1T). - Olivia
 S3
S3
- Sumaibito

 All allies instantly perform a normal attack without using up a turn.
- Qilin

- Olivia
 S3
S3 S2
S2
- Threo
 S3
S3 Sacrifice 99% of caster’s current HP to deal plain damage to all foes (Damage cap: ~820,000).
Damage dealt is based on HP consumed.
Gain Shield (3000).
Level 95:
Also inflict Earth DEF Lowered (25%, Accuracy: ≥100%, 180s).
Damage cap increased to ~1,230,000.
Level 130:
Damage increased and damage cap increased to ~2,040,000.
When HP is below 25%: Also gain Tri-Slash (1T). - Sumaibito

 Gain Counters on DMG (3 times, 2T), Full-Force Counter (2T), DEF Up (150%, 2T), Full Hostility (2T), and Veil.
- Olivia
 S3
S3
- Raziel (Summer)
 S2
S2
- Sumaibito

 All allies instantly perform a normal attack without using up a turn.
- Raziel (Summer)
 S3
S3

- Mammoth
Reference
ディアスポラ手動1T〆レスラー、エミリアクビにしてブラッシュアップしたやつ pic.twitter.com/skjdS9XSqW
— 化野 (@ihino_) July 2, 2024
Notes
- If no Triple Zero, use Yggdrasil Omega
 main for either setup.
 - Requires 7 red skills and 3 yellow skills from the frontline saccs and the two MC skills that aren’t tag team. Mix and match based on what is available.
7T 
Rotation
- Turn 1
- Turn 2
- Cucouroux (Halloween)
 S2
S2 6-hit, 100% Earth damage to a foe (Damage cap: ~90,000 per hit).
Gain Dodge Rate Boosted (70%, 3T) and Hostility Boosted (+50, 3T). 
- Cucouroux (Halloween)
- Turn 3
- Turn 4
- Illnott (Summer)
 S2
S2 All allies gain TA Up (100%, 4T) and Bonus Earth DMG (30%, 4T).
Inflict Shorted (4T) on all allies.
(Consumes 100% of all allies’ charge bars.) , S3 Inflict Fluorescence 5 (Accuracy: 200%, 5T) on all foes.
(Can’t recast.)  ALL
ALL
- Illnott (Summer)
- Turn 5


- Cucouroux (Halloween)
 S1
S1 6-hit, 100% Earth damage to random foes (Damage cap: ~60,000 per hit).
Inflict Debuff Resistance Lowered (Stackable) (10% (30% Max), Accuracy: 100%, 180s) and Earth Lowered (Stackable) (10% (30% Max), Accuracy: 100%, 180s) on all foes.
Gain Covering Fire (3T). - Caim
 S2
S2 Beginning of Joker: Copy an ally’s skill.
(Skill changes to End of Joker upon casting.)
End of Joker: All Earth allies gain ATK Up (30%, Multiplier: Normal, 3T), DEF Up (30%, 3T), TA Up (20%, 3T), Revitalize (500 HP or 10% charge bar, 3T), Shield (2000, 3T), DMG Cap Boosted (10%, 3T), Uplift (15%, 3T), Hype (1-4 stacks, 3T), and Veil.
(Skill changes to Beginning of Joker upon casting.) , S1 All Earth allies gain Double Deal (1 times).
(Can’t recast.) - Uriel


- Turn 6
- Galleon

- Vikala (Summer)
 S2
S2 Other Earth allies gain Double Strike (1T).
Self-inflict C.A. Sealed (Can’t be removed) (3T). - Caim
 S4
S4 Skill effect changes based on the card selected.
(Can only be used after The Fool Upright activates.) => Beatdown, S3 Skill effect changes based on the type of skill that is first used by a main ally.
- Cucouroux (Halloween)
 S3
S3 Instantly perform a normal attack without using up a turn.
(Consumes 2 Barrel Stabilizer to end cooldown.) - Luchador

 All allies instantly perform a normal attack without using up a turn.
,
  All allies instantly perform a normal attack without using up a turn.

- Galleon
- Turn 7
- Vikala (Summer)
 S2
S2 Other Earth allies gain Double Strike (1T).
Self-inflict C.A. Sealed (Can’t be removed) (3T). - Caim
 S4
S4 Skill effect changes based on the card selected.
(Can only be used after The Fool Upright activates.) => Beatdown 
- Vikala (Summer)
Reference
Notes
- Requires Caim skill 4.
Hrunting
Berserker with the 150 GM weapon Hrunting
 is the fastest way to clear the raid thanks to it turning MC into a high damage monster. It uses Berserker’s ultimate mastery skill Beast Fang
![]() 400% Elemental damage to a foe (Damage cap: ~635,000).
400% Elemental damage to a foe (Damage cap: ~635,000).
Inflict ATK Lowered (25%, 180s) and DEF Lowered (25%, 180s).
Gain DMG Cap Boosted (Can’t be extended) (50%, 2T).
(When Ulfhedinn is in effect: Auto-activates upon normal attacks.)
in combination of Hrunting’s double strike for this.
2T
Rotation
- Turn 1

- Makura (Valentine)
 Snuggle Bunny
- Raziel (Summer)
 Book of Sunlight, Page 19

- Turn 2

- Glorybringer

 Call forth the main weapon’s hidden power.(Casts main weapon’s Awaken skill.
Gain maximum Energized stacks.) Sabre- and katana-specialty allies gain Double Strike (1T).
(Consumes 15 Energized (icon)Energy.) - Makura (Valentine)
 Tender Loving Hare
- Threo
 S2
S2 Gain Counters on Dodge (200%, 3 times, 3T).
Level 85:
Counter buff upgraded to Counters on Dodge/DMG (200%, 3 times, 3T).
Also gain Guaranteed TA (1T) and Full Hostility (Can’t be removed) (1T). S3 Sacrifice 99% of caster’s current HP to deal plain damage to all foes (Damage cap: ~820,000).
Damage dealt is based on HP consumed.
Gain Shield (3000).
Level 95:
Also inflict Earth DEF Lowered (25%, Accuracy: ≥100%, 180s).
Damage cap increased to ~1,230,000.
Level 130:
Damage increased and damage cap increased to ~2,040,000.
When HP is below 25%: Also gain Tri-Slash (1T). 
Reference
Notes
- Equip Threo with a 70% DEF down artifact.
4T
Rotation
- Turn 1
- Makura (Valentine)
 Snuggle Bunny
 Tender Loving Hare
- Raziel (Summer)
 Book of Sunlight, Page 19
- Chaos Ruler
 [[[ms*|bleak-discorder]]]
- Makura (Valentine)
- Turn 2
- Turn 3
- Turn 4
Notes
- Fast due to low button presses.
1T
Rotation
- Turn 1
- Mammoth

- Threo
 S3
S3 Sacrifice 99% of caster’s current HP to deal plain damage to all foes (Damage cap: ~820,000).
Damage dealt is based on HP consumed.
Gain Shield (3000).
Level 95:
Also inflict Earth DEF Lowered (25%, Accuracy: ≥100%, 180s).
Damage cap increased to ~1,230,000.
Level 130:
Damage increased and damage cap increased to ~2,040,000.
When HP is below 25%: Also gain Tri-Slash (1T). - Glorybringer

 Call forth the main weapon’s hidden power.(Casts main weapon’s Awaken skill.
Gain maximum Energized stacks.) Sabre- and katana-specialty allies gain Double Strike (1T).
(Consumes 15 Energized (icon)Energy.) Gain Bonus DMG (30%, 3T), Element ATK Up (20%, 3T), and Blade of Glory (Increase the debuff success rate of sword energy by 40%, 3T).
- Raziel (Summer)
 S2
S2 S1
S1
- Olivia
 S2
S2 S3
S3
- Qilin

- Threo
 S3
S3 Sacrifice 99% of caster’s current HP to deal plain damage to all foes (Damage cap: ~820,000).
Damage dealt is based on HP consumed.
Gain Shield (3000).
Level 95:
Also inflict Earth DEF Lowered (25%, Accuracy: ≥100%, 180s).
Damage cap increased to ~1,230,000.
Level 130:
Damage increased and damage cap increased to ~2,040,000.
When HP is below 25%: Also gain Tri-Slash (1T). - Olivia
 S2
S2 S3
S3 S2
S2
- Raziel (Summer)
 S2
S2 S3
S3

- Mammoth
Notes
- Requires 6 red skills and 3 yellow skills between the two sac units and MC’s last skill.
4T
Rotation
- Turn 1
- Illnott (Summer)
 S2
S2 All allies gain TA Up (100%, 4T) and Bonus Earth DMG (30%, 4T).
Inflict Shorted (4T) on all allies.
(Consumes 100% of all allies’ charge bars.) S3 Inflict Fluorescence 5 (Accuracy: 200%, 5T) on all foes.
(Can’t recast.) - Berserker

 Remove 1 debuff from all parties.
 Gain C.A. Instant Standby, ATK Up (50%, Multiplier: Normal, 1T), and Chain Burst DMG Boosted (30%, 1T).
Level 30:
Also gain C.A. DMG Boosted (1 time) (20%) and C.A. DMG Cap Boosted (1 time) (10%). Gain <span class=”image_link”><span class=”tooltip” style=”border-bottom: 0;”>[[File:status_3097.png|25px|link=Status Effects]][[Status Effects|Ulfhedinn]]<span class=”tooltiptext”>ATK and DEF are boosted / Deals triple attacks / Bonus Elemental DMG effect / Debuff immunity / Can’t use skills (Can’t be removed)<br /><span class=”hr”></span><strong>Strength</strong>: 50% ATK Up, 50% DEF Up, 30% Bonus DMG, and guaranteed triple attacks<span class=”hr”></span><strong>Multiplier</strong>: [[Damage Formula/Detailed Damage Formula#Total Char Unique ATK boosts|Unique]]<span class=”hr”></span><strong>Duration</strong>: 4 turns</span></span></span>.’”`UNIQ–ref-00000016-QINU`”‘<br />(Consumes 100% of charge bar.)
- Cucouroux (Halloween)
 S3
S3 Instantly perform a normal attack without using up a turn.
(Consumes 2 Barrel Stabilizer to end cooldown.) 
- Illnott (Summer)
- Turn 2
- Turn 3

- Cucouroux (Halloween)
 S1
S1 6-hit, 100% Earth damage to random foes (Damage cap: ~60,000 per hit).
Inflict Debuff Resistance Lowered (Stackable) (10% (30% Max), Accuracy: 100%, 180s) and Earth Lowered (Stackable) (10% (30% Max), Accuracy: 100%, 180s) on all foes.
Gain Covering Fire (3T). - Caim
 S2
S2 Beginning of Joker: Copy an ally’s skill.
(Skill changes to End of Joker upon casting.)
End of Joker: All Earth allies gain ATK Up (30%, Multiplier: Normal, 3T), DEF Up (30%, 3T), TA Up (20%, 3T), Revitalize (500 HP or 10% charge bar, 3T), Shield (2000, 3T), DMG Cap Boosted (10%, 3T), Uplift (15%, 3T), Hype (1-4 stacks, 3T), and Veil.
(Skill changes to Beginning of Joker upon casting.) S4 Skill effect changes based on the card selected.
(Can only be used after The Fool Upright activates.) => Beatdown 
- Turn 4
- Beelzebub

- Vikala (Summer)
 S2
S2 Other Earth allies gain Double Strike (1T).
Self-inflict C.A. Sealed (Can’t be removed) (3T). 
- Beelzebub
Reference Videos
スポラ手動4T
— こまちゃん (@BIGKOMATU) April 19, 2024
奥義オンのままできていいゾ~これ pic.twitter.com/8OXmMhEJzT
Older Rotation
Notes
- FLB Caim is used to duplicate and copy powerful skills for fast skills.
- Grid is flexible. Characters are not.
- Green pots or guards can be used on Turn 2.
5T 
Rotation
- Turn 1
- Mammoth

- Galleon
 S3
S3 Gain The Gold’s Foundation (Multiplier: Perpetuity).
(Can’t recast.) . S1 Grant another Earth ally Landslide’s Blessing.
(When Landslide’s Blessing is already granted:
Restore 100% of target’s HP [Healing cap: 10,000] and remove all debuffs.) =>
- Cucouroux (Halloween)
 S3
S3 Instantly perform a normal attack without using up a turn.
(Consumes 2 Barrel Stabilizer to end cooldown.) 
- Mammoth
- Turn 2
- Godsworn Alexiel

- Berserker

 Gain C.A. Instant Standby, ATK Up (50%, Multiplier: Normal, 1T), and Chain Burst DMG Boosted (30%, 1T).
Level 30:
Also gain C.A. DMG Boosted (1 time) (20%) and C.A. DMG Cap Boosted (1 time) (10%). Gain <span class=”image_link”><span class=”tooltip” style=”border-bottom: 0;”>[[File:status_3097.png|25px|link=Status Effects]][[Status Effects|Ulfhedinn]]<span class=”tooltiptext”>ATK and DEF are boosted / Deals triple attacks / Bonus Elemental DMG effect / Debuff immunity / Can’t use skills (Can’t be removed)<br /><span class=”hr”></span><strong>Strength</strong>: 50% ATK Up, 50% DEF Up, 30% Bonus DMG, and guaranteed triple attacks<span class=”hr”></span><strong>Multiplier</strong>: [[Damage Formula/Detailed Damage Formula#Total Char Unique ATK boosts|Unique]]<span class=”hr”></span><strong>Duration</strong>: 4 turns</span></span></span>.’”`UNIQ–ref-00000016-QINU`”‘<br />(Consumes 100% of charge bar.)

- Godsworn Alexiel
- Turn 3
- Cucouroux (Halloween)
 S1
S1 6-hit, 100% Earth damage to random foes (Damage cap: ~60,000 per hit).
Inflict Debuff Resistance Lowered (Stackable) (10% (30% Max), Accuracy: 100%, 180s) and Earth Lowered (Stackable) (10% (30% Max), Accuracy: 100%, 180s) on all foes.
Gain Covering Fire (3T). - Vikala (Summer)
 S3
S3 Switch out with a sub ally.
(When Vikala switches with an Earth ally:
Ally borrows rat-ear headband while Vikala is a sub ally. [Ally gains Mighty Mouse (Multiplier: Perpetuity).]) - Cidala
 S3
S3 Gain Dodge All (1T), Substituted (All-Ally) (1T), and Twin Tiger Feng Shui (1T).
(Can’t attack. On next turn: Gain ATK Sharply Boosted (50%, Multiplier: Assassin, 1T) and Guaranteed TA (1T).) 
- Cucouroux (Halloween)
- Turn 4
- Turn 5
Reference
Notes
- Even faster variant thanks to the power of Fang of the Dragonslayer Mk II

Full Auto Blue Chest
Yamato
9T 
![]()
![]()
Reference
Manadiver
4-5T 

![]()
![]()
![]()
![]()
Reference
Notes
- Zeta can be replaced by any character with 3 red skills and 1 yellow.
10-11T 
![]()
![]()
Reference
Berserker
3T 
![]()
![]()
![]()
![]()
Reference
今やってるスポラあげとく
— しすこんごりら (@02Jkk) December 8, 2025
スマホでも30秒かからないので少しでも部屋速⤴︎︎︎の一因になれば…
FAなら動画で打ってるアビは基本オンで、ゴブロQ仕込んで主人公の1を追加オン、マコラ3オフにすれば🙆♀️
ダメージ足りなければラジ2とかマコラ3ONで🙆♀️
まだ足りなければオフにして1ターン増やすとか pic.twitter.com/8YM0dx7ngH
Notes
- Can replace Raziel with Threo
 .
.
6T 

![]()
![]()
![]()
![]()
Reference
Notes
- Olivia can be replaced by Cucouroux (Halloween)
 .
.
Glorybringer
3T 

![]()
![]()
Reference
新ブースト武器採用
— クワトロ【GBF】quwatoro (@quwatoro_gbf) August 31, 2024
ディアスポラフルオート
貢献度400万 3ターン〆
フレティタ、終末虚詐
3ターン目以降もかなり殴れるので継続戦闘力あります
マンドラとかはなくても良さそう
フラウやゾーイは火ゼタやクビラでも行けます pic.twitter.com/Zch0QQLjg9
Notes
- Requires 6 red skills and 2 yellow from sac units.
Sumaibito
2T 
![]()
![]()
Reference
Notes
- Requires 3 red skills and 5 yellow skills from sac units.
- Equip Threo with a 70% DEF down artifact.
Other Raids
Raid Pages








































































































































































2 responses to “Diaspora”
Is there any guide for bluechest with Hrunting but without H.Cucu? Thank you!
Is there ANY non-caim flb Okto hosting option? For Mango users