Tiamat Credo Omega is the wind raid of the M3 series. This guide will go over the basic details of the fight as well as setups for fighting it. For more detailed mechanics information, please check the wiki.
Overview
Information
- JP Name: ティアマト・アウラマグナ
- HP: 960,000,000
- Defense: 12
- Blue Chest: 1,232,496 honors
Links
Drops
These are the most notable drops from this raid. Any unlisted weapons are safe to fodder.

- Mat for converting to Aura Omega Anima.

- Used for uncapping M3 weapons and trranscending Omega summons.
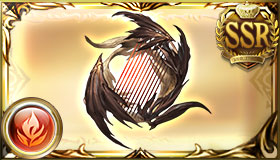
Procella Populans |
Massive wind DMG to a foe / Hit to ATK / Chance of Delay effect
Additional effect at 4★: |
|---|
|
Omega Exalto Aeros
|
20% boost to Stormwyrm’s weapon skills |
|---|---|
|
Stormwyrm’s Might II
|
Big boost to wind allies’ ATK |
|
Storm’s Vivification
|
Boost to ATK and DMG cap based on how many weapons with Stormwyrm’s weapon skills are equipped |
- Big ATK, 20% boost to Omega weapon skills and 2% EX, and 1% cap up per weapon with an Omega skill slotted.
- Core weapon for M3.
- Very easy to reach 20% cap up with them.
- Exalto skill is great for reaching the aura boost needed for Dark Rapture Zero keys.
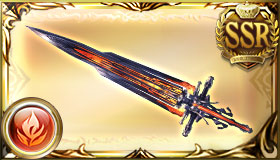
Inexorabilis Calamitas |
Massive wind DMG to a foe / Hit to ATK / Boost to all allies’ DMG cap
Additional effect at 4★: |
|---|
|
Stormwyrm’s Bloodshed III
|
Big boost to wind allies’ ATK / Take DMG worth 20% of max HP at battle start |
|---|---|
|
Stormwyrm’s Might
|
Medium boost to wind allies’ ATK |
- Big ATK taking 20% max HP at battle start and medium ATK.
- Great for activating low HP values with minimal input.
- Typically weaker slotting these over enmity mods for Spartan setups.
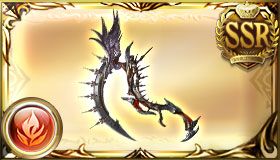
Falx Perfurens |
Massive wind DMG to a foe / Hit to ATK / Boost to all allies’ skill DMG
Additional effect at 4★: |
|---|
|
Stormwyrm’s Tempering III
|
Big boost to wind allies’ skill DMG cap / Big supplemental boost to skill DMG |
|---|---|
|
Stormwyrm’s Garrison
|
Small boost to wind allies’ DEF based on how low HP is |
- Big Skill Cap, big Skill Supp, and small Garrison.
- Great source of skill increase especially for longer fights where the garrison becomes use.
- Lacks attack mods.
Conditional Loot

Tiamat Aura Omega features a new kind of chest drop. The Conditional Chest’s drop rate will increased based on the player’s in the raid being able to meant a specific condition. Conditions can be completed multiple times for multiple stacks. Each stack on the chest indicates a 10% chance for the chest to drop maxing at 100% at 10 stacks.
For Aura, the condition is to hit 10 times with skill damage in a turn. This is most easily done via Manadiver’s skill nukes on normal attacks..
Completing the condition provides a boost of honors. If you can not blue chest the raid, you can aim for the conditional chest and get a solid amount of honors just from doing that.
Blue Chest Setups
Blue chests are awarded based on the amount of honors achieved in a raid maxing out at 99% chance at raid specific amount of honors: ~1M in the case of Tiamat Aura Omega. They contain the most desirable drops in a raid such as the weapon drops. When farming a raid, this is the chest you want to aim for. The typical strategy is to deal the blue chest amount and then moving onto the next raid. Below is a list of strategies on how to effectively and quickly achieve blue chests.
These setups are oriented towards players with stronger grids and characters.
Chrysaor
Rotation
- Turn 1
- Beelzebub

- Chrysaor

 Gain Blade Swap (Old) (1T) and C.A. DMG Boosted (1 time) (1T).
(Can only be used when an auxiliary weapon is equipped.) Gain C.A. Reactivation (2T).
(Can only be used when an auxiliary weapon is equipped.) 2-hit, 100% elemental damage to a foe (Damage cap: ~80,000 per hit).Inflict ATK Lowered (Stackable) (10% (40% Max), 180s) and DEF Lowered (Stackable) (10% (40% Max), 180s).Gain Charge Boost (20%).(Activates upon chain burst activation. Number of hits increased based on number of chains [Max: 10 hits].)
- Shion
 S2
S2 300% Fire damage to a foe (Damage cap: ~350,000).
Gain Charge Bar (20%).
(Number of activations increased based on number of katana-specialty allies in party [Max: 6].) 
- Beelzebub
Notes
- With Shion can use any Katana prof characters.
- Without use anyone with large CAs.
Standard Manadiver
Rotation
- Turn 1
- Beelzebub

- Manadiver

 Fill 3 charge diamonds on all foes.All allies gain Bonus DMG (20%, 3T), Charge Boost (30%), and 1 Elemental Crest (Hellfire CrestDeluge CrestWasteland CrestTyphoon CrestAurora CrestOblivion Crest).(Crest gained based on caster’s element.)
- Percival (Grand)
 S3
S3 900% Fire damage to all foes (Damage cap: ~1,020,000).
All Fire allies gain Fire ATK Up (100%, 1T) and Bonus Fire DMG (1 time) (30%, 1T).
All Fire allies instantly perform a normal attack without using up a turn.
(Consumes King’s Blaze after activation.) 
- Beelzebub
Notes
Alanaan Manadiver
Rotation
- Turn 1
- Yatima

- Manadiver

 Fill 3 charge diamonds on all foes.All allies gain Bonus DMG (20%, 3T), Charge Boost (30%), and 1 Elemental Crest (Hellfire CrestDeluge CrestWasteland CrestTyphoon CrestAurora CrestOblivion Crest).(Crest gained based on caster’s element.)
(optional)
 - Alanaan
 S4
S4
- Percival (Grand)
 S3
S3 900% Fire damage to all foes (Damage cap: ~1,020,000).
All Fire allies gain Fire ATK Up (100%, 1T) and Bonus Fire DMG (1 time) (30%, 1T).
All Fire allies instantly perform a normal attack without using up a turn.
(Consumes King’s Blaze after activation.) 
- Yatima
Notes
Surtr Manadiver
Rotation
- Turn 1
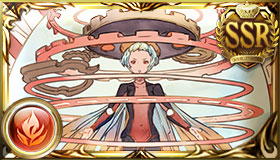
- The Sun (SSR)
- Percival (Grand)
 S3
S3 900% Fire damage to all foes (Damage cap: ~1,020,000).
All Fire allies gain Fire ATK Up (100%, 1T) and Bonus Fire DMG (1 time) (30%, 1T).
All Fire allies instantly perform a normal attack without using up a turn.
(Consumes King’s Blaze after activation.) 
- The Sun (SSR)
Notes
Full Auto
Players can also choose to full auto their own host. While it is slower than blue chesting, it is an easy way to get another drop chance with minimal effort. The following strategies focus on soloing the raid which is particularly helpful for slow periods. But it is strongly reccomended to call up backup request after securing a good blue chest chance to speed up the clear.
Characters
Lumberjack
Reference Video
Manadiver
Reference Video
Other Raids
Links to the other raids.
Raid Pages


































































































































9 responses to “Tiamat Aura Omega”
The Chrysaor team notes are just the Standard Manadiver team notes copied and they don’t really apply at all
Thank you! Fixed
If I have both options available should I use shion or manadiver?
Manadiver
Some proofreading: weapon source listed as LUMINIERA CREDO.
Tiamat Arc Aura: “Bloodshed takes 20% HP at battle start pushing you further into enemity[enmity] territory.”
Tiamat Edge Aura: “Skill Supplmental[Supplemental], Skill Cap, and Garrision[Garrison] in one weapon.”
“Completing the condition provides a boost of honors. If you can not blue chest the raid, you can aim for the conditional chest and get a solid amound[amount] of honors just from doing that.”
Thank you for your continued guides, you help us that don’t want to math greatly, was waiting for this one to get an efficient team out.
Uh, for the Surtr comp, the rotation states to use Bubs call… But you have Surtr as main summon. What’s the actual rotation?
Oops. Should be Sun. Corrected.
I think the Chrysaor Main summon is meant to be Bubz, since the call is in the rotation.
If you don’t have Shion, but have a Kaneshige handy, you can slot it as Aux weapon and use Blade swap to get 5chains.