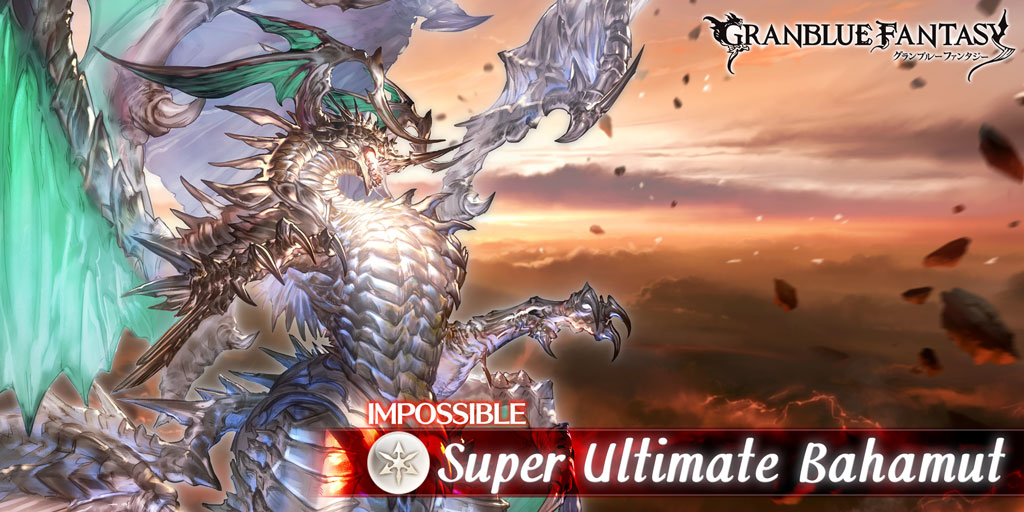
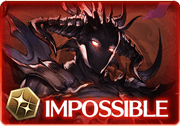
Super Ultimate Bahamut

Overview

Information

  • JP Name: スーパーアルティメットバハムート or スパバハ
  • HP: 3,000,000,000
  • CT: 2
  • Defense: 18 (45 at 10 Earth Tenents)

Links

Drops

These are the most notable drops from this raid.
Ultimate Memory
  • Mat required for ULB Ultimas, Ultima keys, and bullet crafting.

Mechanics

Tenents

Super Ultimate Bahamut starts the battle with 10 stacks of the following Tenents.

Fire Tenent

  • ATK is boosted based on lvl (Can’t be removed / Max: 10 / Lvl lowers each time a fire party cancels an Omen)
  • 15% ATK per Lvl. Max of 150% ATK up.

Water Tenent

  • Debuff resistance is boosted based on lvl (Can’t be removed / Max: 10 / Lvl lowers each time a water party cancels an Omen)

Earth Tenent

  • DEF is boosted based on lvl (Can’t be removed / Max: 10 / Lvl lowers each time an earth party cancels an Omen)
  • 15% DEF per Lvl. Max of 150% DEF up.

Wind Tenent

  • Multiattack rate is boosted based on lvl (Can’t be removed / Max: 10 / Lvl lowers each time an wind party cancels an Omen)

Light Tenent

  • All allies’ HP is lowered at end of turn based on lvl (Can’t be removed / Max: 10 / Lvl lowers each time a light party cancels an Omen)
  • 1% Max HP per Lvl. Max of 10% max HP. Caps at 5k.

Dark Tenent

  • Normal attacks have a chance to remove 2 buffs from targeted allies based on lvl (Can’t be removed / Max: 10 / Lvl lowers each time a dark party cancels an Omen)

Phase One (100% – 52%)

CT Omens

Termination Flare

  • 23-hit random-element DMG to random allies (3500% DMG total). Last 3 hits deal massive DMG.
  • Inflict Burned and Petrified to all allies.
  • Random cut to buff durations.
  • Cancel: Deal 15,000,000 damage..

Empyreus Verse

  • 4000% random-element DMG to the ally with the lowest current HP.
  • Switches random allies with backline allies.
  • Cancel: Deal 20,000,000 damage.

HP Omens

Daedalus Drive (75%)

  • 40,000 plain DMG to all allies.
  • Inflict 6T Strong Armed Can’t be healed  to all allies.

Arcadia Omens

Arcadia Foteinos

  • 100% random-element DMG to all allies.
  • Purging Light Casts random debuff effect each turn (Can’t be removed) to foe.
    • Casts random debuff effect each turn (Can’t be removed).
  • Cancel: Land 10 Debuffs.

Arcadia Skliros

  • 100% random-element DMG to all allies.
  • DMG Cut Nullified Nullifies ‘all elemental DMG cut’ (Can’t be removed) to foe.
    • Nullifies ‘all elemental DMG cut’ (Can’t be removed).
  • Cancel: Deal 20,000,000 Charge Attack DMG.

Arcadia Laimargos

  • 100% random-element DMG to all allies.
  • Superior Elemental DMG Deals elemental DMG superior to each target’s element (Can’t be removed) to foe.
    • Deals elemental DMG superior to each target’s element (Can’t be removed).
  • Cancel: Deal 20,000,000 Skill DMG.

Arcadia Gnosis

  • 100% random-element DMG to all allies.
  • Godsight Attacks and debuffs don’t miss (Regardless of debuffs or buffs like Blind, hit to accuracy, Mirror Image, debuff resistance, and debuff immunity / Can’t be removed) to foe.
    • Attacks and debuffs don’t miss (Regardless of debuffs or buffs like Blind, hit to accuracy, Mirror Image, debuff resistance, and debuff immunity / Can’t be removed)
  • Cancel: Hit the foe 60 times.

Phase Two (51% – 11%)

At 51%, readies Omnipotent Cocoon.

Omnipotent Cocoon (51%)

  • Gains Omnipotent Cocoon One of Fire Tenet, Water Tenet, Earth Tenet, Wind Tenet, Light Tenet, or Dark Tenet rises by 1 lvl at end of turn (Can’t be removed)
    • One of Fire Tenet, Water Tenet, Earth Tenet, Wind Tenet, Light Tenet, or Dark Tenet rises by 1 lvl at end of turn (Can’t be removed).
    • Foe does not normal attack.
    • Last five turns.
  • Cancel: Deal 50,000,000 DMG

After Omnipotent Cocoon is removed:

  • Gains Unchallenged (10%) HP won’t lower below 10% (Can’t be removed) Double Strike and Overdrive (3T) In overdrive (Can’t be removed)
  • Gains Purging Light Casts random debuff effect each turn (Can’t be removed)  / Superior Elemental DMG Deals elemental DMG superior to each target’s element (Can’t be removed) Godsight Attacks and debuffs don’t miss (Regardless of debuffs or buffs like Blind, hit to accuracy, Mirror Image, debuff resistance, and debuff immunity / Can’t be removed) DMG Cut Nullified Nullifies ‘all elemental DMG cut’ (Can’t be removed) based on unreceived Arcadia omens from previous phase.
  • Normal attacks now hit all allies.

On every turn that is a multiple of 6:

  • Readies one of three random Arcadia omens.
  • Each omen can only appear once.

After every turn that is a multiple of 5:

  • Gains Bonus Fire DMG (5T) Deals bonus fire DMG for one-foe one-ally attacks BonusWater DMG (5T) Deals bonus water DMG for one-foe one-ally attacks Bonus Earth DMG (5T) Deals bonus earth DMG for one-foe one-ally attacks Bonus Water DMG (5T) Deals bonus Wind DMG for one-foe one-ally attacks Bonus Light DMG (5T) Deals bonus light DMG for one-foe one-ally attacks , or Bonus Dark DMG (5T) Deals bonus dark DMG for one-foe one-ally attacks  for each Tenet above 5 stacks.

CT Omens

Crisis Crunch

  • Plain DMG to an ally with the highest current HP worth 100% of their max HP.
  • Inflict Death Ineluctable Can’t be revived (Can’t be removed) if the ally is knocked out.
  • Cancel: Deal 20,000,000 damage.

Arcadia Omens

Arcadia Eclipse

  • 100% random-element DMG to all allies.
  • Inflicts Max HP Capped (20,000) Max HP is capped at 20,000 (Can’t be removed) to foe.
    • Max HP is capped to 20,000 (Can’t be removed).
  • Cancel: Deal 3,333,333 plain DMG.

Arcadia Tromos

  • 100% random-element DMG to all allies.
  • Inflicts Defenseless Guard can’t be used (Can’t be removed) .
    • .Guard can’t be used (Can’t be removed).
  • Cancel: Deal 20,000,000 Charge Attack DMG.

Arcadia Apocryphus

  • 100% random-element DMG to all allies.
  • Inflicts Summonless Can’t use summons (Can’t be removed)
    • Can’t use summons (Can’t be removed)
  • Cancel: Use 12 skills..

Phase Three (10% – 0%)

Sirius Origin (10%)

  • 99,999 plain DMG to 4 allies.
  • DMG reduced with fewer targets.
  • Inflicts Defenseless Guard can’t be used (Can’t be removed) Summonless Can’t use summons (Can’t be removed) Max HP Capped (20,000) Max HP is capped at 20,000 (Can’t be removed) based on unreceived Arcadia omens from previous phase.
  • Gains Drain HP is restored based on DMG dealt (Can’t be removed) Double Strike Attacks twice each turn (Can’t be removed) , and self-inflicts Gravity (5T) Max charge diamonds are increased (Can’t be removed) – Gravity (7T) Max charge diamonds are increased (Can’t be removed)
  • Removes Unchallenged (10%) HP won’t lower below 10% (Can’t be removed)

CT Omens

Genesis Nova (First Time Only)

  • 999,999 plain DMG to all allies.
  • Inflicts Death Ineluctable Can’t be revived (Can’t be removed) on knocked out allies.

Crisis Crunch (Replaces Genesis Nova)

  • Plain DMG to an ally with the highest current HP worth 100% of their max HP.
  • Inflict Death Ineluctable Can’t be revived (Can’t be removed) if the ally is knocked out.
  • Cancel: Deal 20,000,000 damage.

General Strategy

SUBHL is generally a straight forward raid. This is mostly due its regular omens having Deal X DMG as its cancel requirement. SUBHL is more than anything a DPS check. As long as you can maintain consistent damage to cancel the damage omens, nothing about the raid is complicated.

The gameplan is to generally get to the omen turns as quickly as possible and then cancel them. This will lower the appropriate elemental Tenant for everyone and make everything easier for everyone. For CA setups, this generally means guarding select characters to prevent full chains on the non omen turns and to save CAs for omen turns to meet damage requirements. At the start when Earth Tenents are at their highest, the damage omens will typically be the hardest to cancel. You may need to press some skills or use a summon with high call damage like Lucifer to help clear it. Stronger setups can cancel these omens without issue even at 10 Earth Tenents. But ultimately keep in mind your own ease of being able to clear them. As the Earth Tenents lower, it will be easier and easier to cancel the 15M and 20M damage omens even as they occur more frequently.

In the first 50%, you’ll have the four Arcadia Omens to deal with every multiple of 6 turns. Depending on the element you play will determine which Arcadia omens are able to be cancelled or worth trying to cancel. Generally for slower setups, you want to cancel as many as you can. But for fast ones you don’t need to cancel any. In a 6 person room, you won’t see all four before 51%. This will usually result in SUBHL getting the buff from two of the Omens once you exit the Cacoon.

The other main concern in Phase 1 is the 75% trigger Daedalus Drive. It deals 40k plain and inflicts 6 turns of an unclearable Strong Armed Can’t be healed . There are two main ways people deal with it. The first and more straightforward way is to tank it. To do this, you’ll need to have plenty of HP before tanking this. Since you can’t heal for 6 turns after, you’ll need to have enough HP to survive 6 turns of SUBHL’s attacks and the plain damage in addition to the 40k intial damage. The second way is to use a character with sub all to tank all the plain damage. This is a lot easier for those with lower HP pools and helps with survivability in general.

Moving into Phase 2 much remains the same, except SUBHL will output a lot more damage.

The main thing of note here is the 51% trigger Omnipotent Cocoon. During these 5 turns, SUBHL will raise one of the Tenents at the end of the turn at the cost not being able to attack. Cocoon can be exited by dealing 50M damage total since Cocoon started. There are two strategies for exiting Coccon. One is to simply exit it ASAP. This is faster and prevents Tenents from raising. The other is to wait to exit it until you cross a turn a that is a multiple of 6. This is to avoid running into a Arcadia omen. I wouldn’t waste more than three turns doing this. But since the Arcadia omens in the second half can be quite rough it would be good to consider on slower runs.

On that note, this time their are three Arcadia Omens. Like before you can cancel or ignore these. Of these, Arcadia Eclipse is generally the most annoying due to capping HP at 20k. The 3,333,333 plain damage cancel is also just out of range of Bubs call as well. The general strategy to deal with it is to honestly just hope you don’t get it. Some 6 man setups can clear it and solo setups have to, but for the rest its to hope to not get it.

And for Phase 3, the challenge ramps up a ton due to the massive buffs and drain SUBHL gets. This is why 6 man setups will completely ignore it. While SUBHL does have a 10% Unchallenged buff that makes it impossible to damage it past 10% without eating Sirius Origin, it doesn’t actually gain this buff until you break Cocoon. So if you park someone before Cocoon, they can burst down the final 10% without needing to dealing with Sirius Origin.

Player Composition

Since the Tenents for the raid all have different effects, this makes certain elements more desirable for the raid. In particular, the general value of importance is listed before.

Earth > Wind = Fire > Water > Light > Dark

Earth is easily the most important Element to have in order to lower the DEF of the raid and make it easier for everyone to clear omens and deal damage. Many runs will run two Earth to quickly lower the Tenents down. Doing double Earth is generally reccomended for beginner runs. For advanced ones it is not required at all but still generally ideal.

Wind and Fire are next due to their general impact on survivability. Both the ATK up which makes at 150% up and MA up with a max of 300% are really brutal especially sub 50%. Being able to lower them will go to great length for improving your survivability.

Similarly Water is next for survivability reasons. Being able to put down important debuffs goes a very long way. Light is second to last. It is very noticable but 5k a turn is a lower damage loss than the damage inflicted by SUBHL”s normal attacks.

Dark is by far last.

Typically, you will want 2 Earths in any room, one execute in slower rooms, two executes in faster rooms. For the other slots, if you are in a slower room you will want to make sure to have a variety of elements covering the more important ones. But for fast rooms now, you can pick whatever is available as long as the execute is covered.

Ultima Keys

In the below setups, none of the Ultimas have their third keys. For many players especially for faster rooms, they won’t bother swapping the third keys.

If you want to maximize survivability or effeciency especially for slower rooms, there are three keys to consider.

Dio is general the most useful due to providing 50% healing cap. If you are dealing with long runs or really need to maximize survivability, this is the way to go. Dio is the most used key for solos for SUBHL as well as harder raids like Hexa and Dark Rapture Zero. For SUBHL 6 man its generally overkill but still the best general option.

After that is Ena which provides 10% cap up. Ena is great if you don’t have your cap up maxed. Generally though now with M3 weapons providing cap up this is less valuable. But keep in mind your grid and if you want to push more damage.

Last up is Elatio which provides 10% charge bar gain. This can be pretty nice for any charge attack setup for more frequent CAs. Thought at only 10% it is pretty minor and for many setups won’t make a major difference.

This said, the seraphic key can see some use in Earth setups that use Sandalphon. Only in the case of Elemental Friction being used will the seraphic key show up.

Celestial Substitutions

In any of the below setups, you can swap out the Celestial weapons if you are missing the one specified. Ideally, the best swap is any other Celestial. After that, the best option is to swap to a defensive option either a weapon with more HP or more defense. Either a DEF awakened Revan or Ennead weapon or a Garrison M3 weapon could work.

Damage Dealers

Fire

Kengo

Kengo is a great class due to its consistent damage from charge attacks. This makes cancelling triggers easy and allows for some high damage per turn.

The most essential character for fire Kengo is Silva (Yukata). She provides 15% bar and 5% stackable CA cap (50%) at the end of every turn while her skill 1 Silent Aim Gain Silent Aim (5T). is up as well as 30% bar on casting her skill 2 Ready Volley All Fire allies gain Charge Bar (30%).
(From 2nd cast onward:
All Fire allies also gain C.A. DMG Boosted (1 time) (80%) and C.A. DMG Cap Boosted (1 time) (20%)
From 3rd cast onward:
All Fire allies also gain DMG Cap Boosted (5%, 4T).)
. Another very notable feature attached to her skill 1 is giving Double Strike to the next ally in whenever she CAs which will be at least every other turn.

The typical target for this will be Wilnas thanks to his assassin boosted normal attacks making the most of the double strike. An alternative to him is Luffy who lacks the hard hitting autos but still has strong CAs especially once he gets perma CA reactivation after 10 turns.

Last slot can be Medusa (Summer), Mirin (Summer), Nezha (Yukata), Noa (Holiday), Izmir (Yukata), or Chichiri. Generally you want someone to either help with survivability, boost CA damage, or supply more charge to the party.

Kengo
Silva (Yukata)
Wilnas
Medusa (Summer)
Michael
Main
Friend
Sub
Colossus Omega
Beelzebub
Michael
Qilin
Thor
Lucifer
The Devil (SSR)
Surtr
Unsigned Kaneshige (Fire)
Colossus Cane Ira
Colossus Cane Ira
Covenant-Ruin Fist
Colossus Bomber Ira
Colossus Bomber Ira
Summer’s Mirage
Scimitar of Brahman
Colossus Buster Ira
Scythe of Renunciation
Dagger of Bahamut Coda
Wrathfire Militis
Wrathfire Militis
Kengo
Silva (Yukata)
Wilnas
Medusa (Summer)
Michael
Main
Friend
Sub
Colossus Omega
Beelzebub
Michael
Triple Zero
Thor
Lucifer
The Devil (SSR)
Grand Order
Unsigned Kaneshige (Fire)
Colossus Cane Ira
Colossus Cane Ira
Covenant-Ruin Fist
Colossus Bomber Ira
Colossus Bomber Ira
Summer’s Mirage
Extinction Blade
Extinction Blade
Scythe of Renunciation
Ultima Blade
Heat of The Sun
Refrain of Blazing Vigor
Kengo
Silva (Yukata)
Wilnas
Medusa (Summer)
Michael
Main
Friend
Sub
Agni
Beelzebub
Michael
Triple Zero
Thor
Lucifer
Wilnas
Grand Order
Unsigned Kaneshige (Fire)
Lord of Flames
Lord of Flames
Gateway-Star Sword
Overrider
Partly Powerful Popgun
Purifying Thunderbolt
Extinction Blade Mk II
Extinction Blade
Scythe of Repudiation
Ultima Blade
Heat of The Sun
Refrain of Blazing Vigor
Kengo
Silva (Yukata)
Wilnas
Medusa (Summer)
Michael
Main
Friend
Sub
Agni
Beelzebub
Michael
Triple Zero
Thor
Lucifer
Wilnas
Grand Order
Higurashi
Lord of Flames
Lord of Flames
Gateway-Star Sword
Overrider
Overrider
Purifying Thunderbolt
Extinction Blade Mk II
Extinction Blade
Scythe of Repudiation
Ultima Blade
Heat of The Sun
Refrain of Blazing Vigor

Starting Rotation

Omen Cancels

References

Notes
  • Use Silva’s skill 1 Silent Aim Gain Silent Aim (5T). and skill 2 Ready Volley All Fire allies gain Charge Bar (30%).
    (From 2nd cast onward:
    All Fire allies also gain C.A. DMG Boosted (1 time) (80%) and C.A. DMG Cap Boosted (1 time) (20%)
    From 3rd cast onward:
    All Fire allies also gain DMG Cap Boosted (5%, 4T).)
    as frequently as possible.
  • Guarding Silva on her can’t attack turns will help her survive.
  • Most omens are safe to mash through especially when you either have enough CAs or Wilnas has TA and double strike.

Manadiver

For fast rooms, Fire can use its long form burst strategy with Manadiver. After that, it can keep mashing turns for even more damage but it will eventually bleed out from Light stacks.

Manadiver
Zeta (Grand)
Percival (Grand)
Halluel and Malluel
Alanaan
Michael
Main
Friend
Sub
Yatima
Belial
Shiva
Death (SSR)
The Sun (SSR)
Agni
Michael
Wilnas
Phoenix’s Torch
Lord of Flames
Lord of Flames
Lord of Flames
Overrider
Overrider
Overrider
Crimson Scale
Crimson Scale
Scythe of Repudiation
Ultima Spear
Heat of The Sun
Refrain of Blazing Vigor

Rotation

Omen Cancels

Notes
  • During mash turns, can reapply Renatian Creed All allies gain TA Up (100%, 4T) and Bonus Fire DMG (30%, 4T).
    Inflict Shorted (4T) on all allies.
    (Consumes 100% of all allies’ charge bar.)
    and use clarity after if everyone reaches 100 charge.
  • Use Wild Magica 400% Elemental damage to a foe (Damage cap: ~635,000).Gain Guaranteed TA (2T).(When 50% charge bar is consumed: Also gain Double Strike (2T).) and Zeta (Grand)’s skills whenever they are off cooldown.
  • Can call Shiva once its off cooldown.
  • Likely won’t survive past turn 10.
  • Nezha (Yukata) can replace Zeta.

Water

Kengo

Kengo is water’s traditional strategy for consistent high damage thanks to all the strong CA weapons water has available at all levels. Water also has a lot of strong CA characters allowing for some good flexibility.

The hardest slot to try to replace is Vajra. Vajra has a very invaluable set of buffs to the party via her CAs maxing at 30% ATK, 30% DEF, 30/15 DATA, 30% CB gain, 30% CA damage, 10% CA cap, and 10% cap. This combined with her 200 charge bar limit, up to four turns of double strike at the cost 100 bar, and boosts to her bar on chainburst makes her an excellent CA support and damage dealer. You will pretty much always see her on Water Kengo teams for this and in general.

Next up is Helel ben Shalem (Summer). Like Vajra, she deals a lot of CAs thanks to her having passive CA reactivation when the enemy has ten debuffs. Her CA is also great due to it packing dispel and delay. She also trivializes the debuff omen thanks to her skill 1 Trespass Inflict ATK Lowered (Stackable) (10% (40% Max), Accuracy: 100%, 180s), DEF Lowered (Stackable) (10% (40% Max), Accuracy: 100%, 180s), and Helel_ben_Shalem_(Summer)#Trespass|a random debuff on all foes.
(Consumes 10% of charge bar.)
being spammable and packing three debuffs.

After that there is a fair amount of variety. Common options include Haaselia (either MLB or FLB work), Poseidon, Mirin (Holiday), Fediel (Summer), Wamdus, Europa, Andira (Summer), and Clarisse (Summer). Haase is definitely among the most notable thanks to her skill 3 Phases of the Moon All Water allies gain Water ATK Up (20%, 2T), Tears of Lunacy (2T), and Charge Boost (15%).
Moon waxes.
being reset on CA letting her provide up to 30% bar to party per turn.

Kengo
Vajra
Helel ben Shalem (Summer)
Mirin (Holiday)
Haaselia
Main
Friend
Sub
Leviathan Omega
Beelzebub
Justice (SSR)
Qilin
Nobiyo
Lucifer
Gabriel
Unsigned Kaneshige (Water)
Ancient Auberon
Ancient Auberon
Tyros Zither
Ancient Auberon
Ancient Auberon
Aquamarine Hatchet
Colomba
Colomba
Staff of Renunciation
Dagger of Bahamut Coda
Glacial Militis
Glacial Militis
Kengo
Vajra
Helel ben Shalem (Summer)
Mugen
Haaselia
Main
Friend
Sub
Leviathan Omega
Beelzebub
Justice (SSR)
Triple Zero
Lucifer
Lucifer
Gabriel
Grand Order
Unsigned Kaneshige (Water)
Schrodinger Mk II
Schrodinger Mk II
Worldbreaking Tauros
Schrodinger
Schrodinger
Covenant-Ruin Fist
Tyros Zither
Tyros Zither
Staff of Renunciation
Ultima Staff
Reflection of The Moon
Judgment of Torrential Tides
Kengo
Vajra
Helel ben Shalem (Summer)
Mugen
Haaselia
Main
Friend
Sub
Varuna
Beelzebub
Wamdus
Triple Zero
Lucifer
Lucifer
Gabriel
Grand Order
Unsigned Kaneshige (Water)
Calamitous Aquashade
Gospel of Water and Sky
Knight of Ice
Knight of Ice
Schrodinger
Gateway-Star Sword
Staff of Repudiation
Ultima Staff
Reflection of The Moon
Judgment of Torrential Tides
Kengo
Vajra
Helel ben Shalem (Summer)
Mugen
Haaselia
Main
Friend
Sub
Varuna
Beelzebub
Wamdus
Triple Zero
Lucifer
Lucifer
Gabriel
Grand Order
Shishio
Calamitous Aquashade
Gospel of Water and Sky
Knight of Ice
Knight of Ice
Schrodinger
Gateway-Star Sword
Staff of Repudiation
Ultima Staff
Reflection of The Moon
Judgment of Torrential Tides

Starting Rotation w Mirin Sacc

Starting Rotation w FLB Haaselia

Omen Cancels

References

Notes
  • Generally safe to mash into everything as long as you have enough CAs.
  • For setups with Haaselia, use her skill 3 Phases of the Moon All Water allies gain Water ATK Up (20%, 2T), Tears of Lunacy (2T), and Charge Boost (15%).
    Moon waxes.
    once or twice as needed.
  • Without Haaselia, turn CAs off on turns without omens or selectively guard people to make sure you have enough CAs for omen turns
  • Helel ben Shalem (Summer)’s skill 3 Harlequin Inflict Subjugated 1 (Accuracy: Guaranteed, 1T), DA Down 6 (100%, Accuracy: 200%, 6T), TA Down 6 (100%, Accuracy: 200%, 6T), and Accuracy Lowered 6 (Accuracy: 200%, 6T) on all foes. is excellent for buying a turn to cancel an omen.

Soldier

Another option for Water is burst down the raid with its Soldier setup. Water Soldier can perform enough of a burst to make a solid contribution to the total honors.

Soldier
Sho
Catura (Holiday)
Jeanne d’Arc (Water Summer)
Erika
Haaselia
Main
Friend
Sub
Bahamut
Godsworn Alexiel
Belial (Summer)
Wamdus
Yatima
Qilin
Gabriel
Belial
Hraesvelgr
Exo Antaeus
Exo Antaeus
Worldscathing Leon
I
II
III
IV
V
VI
Exo Antaeus
Exo Antaeus
Gateway-Star Sword
Esna
Esna
Staff of Renunciation
Ultima Gun
Reflection of The Moon
Judgment of Torrential Tides
Soldier
Lucio (Summer)
Anthuria (Holiday)
Zooey (Grand)
Haaselia
Erika
Main
Friend
Sub
Bahamut
Halluel and Malluel
Belial (Summer)
Charybdis
Yatima
Qilin
Gabriel
Belial
Hraesvelgr
Exo Antaeus
Exo Antaeus
Worldscathing Leon
I
II
III
IV
V
VI
Exo Antaeus
Exo Antaeus
Gateway-Star Sword
Esna
Esna
Staff of Renunciation
Ultima Gun
Reflection of The Moon
Judgment of Torrential Tides

Rotation (Catura)

Rotation (Anthuria)

Reference Videos

Earth

Kengo

Earth’s Kengo setup is a great force for HL content thanks to its consistent high damage from CAs as well as a ton of survivability from Satyr (Earth). It can loop CAs easily and will survive with ease.

For it, the two core characters are Eahta and Satyr (Earth). Okto is Earth’s premiere CA attacker thanks to having 200 bar, double CA gain, and strong CAs in general. It is reccomended to have him at least 120 but the 130 upgrade is great upgrade if you can afford the blue paper. Satyr on the other hand is a hostility tank and CA buffer. She provides 5% stackable CA cap (50% max) and 15% bar while her skill 1 Passion Show Gain Passion Show (5T). is up which is invaluable both for the damage output and for consistent CA looping.

Third slot will typically be Monika (Valentine), Sandalphon, Caim FLB, Galleon, and Benjamin. Ideally any character that helps with consistent looping ie Monika or Benjamin or ones that further increase damage ie Sandalphon are ideal.

Additionally, its common to see Alexiel (Summer) used frontline at the start to sub all Daedalus Drive. This is good for slower runs or setups with lower HP. Faster setups or setups with plenty of HP can facetank Daedalus Drive instead.

Kengo
Eahta
Satyr (Earth)
Alexiel (Summer)
Monika (Valentine)
Caim
Main
Friend
Sub
Yggdrasil Omega
Beelzebub
Uriel
Thor
The Hanged Man (SSR)
Lucifer
The Tower (SSR)
Unsigned Kaneshige (Earth)
Ancient Perseus
Nibelung Klinge
Yggdrasil Dewbranch Omega
Galleon’s Jaw
True Judgement Lyre
All-Might Spear
Gateway-Star Sword
Yggdrasil’s Bough
Harp of Renunciation
Sword of Bahamut Coda
Tribunal Lyre Militis
Worldforging Moros
Kengo
Satyr (Earth)
Rackam (Holiday)
Eahta
Caim
Uriel
Main
Friend
Sub
Yggdrasil Omega
Beelzebub
Thor
Triple Zero
Uriel
Lucifer
The Tower (SSR)
Grand Order
Unsigned Kaneshige (Earth)
Ancient Perseus
Ancient Perseus
Ancient Perseus
Galleon’s Jaw
Galleon’s Jaw
Landslide Scepter
Gateway-Star Sword
Binds of The Hanged Man
Harp of Renunciation
Ultima Blade
Worldforging Moros
Bounty of Gracious Earth
Kengo
Satyr (Earth)
Rackam (Holiday)
Eahta
Caim
Uriel
Main
Friend
Sub
Titan
Beelzebub
Thor
Lucifer
Uriel
Lucifer
Galleon
Grand Order
Unsigned Kaneshige (Earth)
Landslide Scepter
Landslide Scepter
Landslide Scepter
Galleon’s Jaw
Galleon’s Jaw
Mirror-Blade Shard
Bab-Bell Rendezvous
Bab-Bell Rendezvous
Harp of Repudiation
Ultima Blade
Worldforging Moros
Bounty of Gracious Earth

Starting Rotation with S.Alex

Starting Rotation with Caim

Omen Cancels

References

Notes
  • Safe to mash through everything.
  • Since Earth tenents are most important to lower, it is advisible to selectively guard or turn off CAs to get to omen turns faster and thus lower stacks faster.
  • Reapply Eahta’s skill 1 Open Spirit Gain ATK Up (50%, Multiplier: Normal, 3T) and Critical Up (30%, 3T).
    (Consumes 10% of charge bar.)
    Level 85:
    Buff increased to Critical Up (100%, 3T).
    Charge bar cost removed.
    Also gain Arda Frava (3T).
    Level 130:
    Also gain C.A. DMG Cap Boosted (Special) (30%, 3T).
    once it is down or once it is available.
  • With a spammable charge bar character like Monika (Valentine) or Benjamin can full chain every turn which makes them great in the later stages.
  • If using Sandalphon, use The Hanged Man (SSR) and use a Seraphic weapon or Seraphic ultima key.

Berserker

Earth has a pair of really strong tools for HL content in Hrunting and Caim FLB. Hrunting’s permanent double strike is an excellent way to deal consisent damage. MC alone is typically enough to clear any damage omen. Caim on the other hand is excellent for survivability thanks to the permanent teamwide water switch on swap in as well as the DEF up and healing. Together they make for team that can easily and quickly mash through everything SUBHL has to offer.

Outside that, the other characters are pretty free. Go for anyone that can do a bunch of damage on their own or provide more buffs for MC. Common examples are Olivia, Galleon, Cidala or Sandalphon.

Berserker
Olivia
Mugen
Galleon
Caim
Uriel
Main
Friend
Sub
Beelzebub
Belial
Galleon
Triple Zero
Halluel and Malluel
Titan
Grand Order
Uriel
Hrunting
Landslide Scepter
Landslide Scepter
Landslide Scepter
Pillardriver
Pillardriver
Gateway-Star Sword
Fang of the Dragonslayer Mk II
Mirror-Blade Shard
Harp of Repudiation
Ultima Axe
Worldvexing Angelos
Bounty of Gracious Earth

Starting Rotation

Omen Cancels

References

Notes
  • MC damage is enough to cancel all damage Omens.
  • Reapply Ulfhedinn Gain <span class="image_link"><span class="tooltip" style="border-bottom: 0;">[[File:status_3097.png|25px|link=Status Effects]][[Status Effects|Ulfhedinn]]<span class="tooltiptext">ATK and DEF are boosted / Deals triple attacks / Bonus Elemental DMG effect / Debuff immunity / Can't use skills (Can't be removed)<br /><span class="hr"></span><strong>Strength</strong>: 50% ATK Up, 50% DEF Up, 30% Bonus DMG, and guaranteed triple attacks<span class="hr"></span><strong>Multiplier</strong>: [[Damage Formula/Detailed Damage Formula#Total Char Unique ATK boosts|Unique]]<span class="hr"></span><strong>Duration</strong>: 4 turns</span></span></span>.'"`UNIQ–ref-00000017-QINU`"'<br />(Consumes 100% of charge bar.) as soon as it is off cooldown.
  • Mugen can be any turn one sac such as any off element character with a sub.
    • If in a Thor run, you will want to use another sac like Rackam (Holiday) as Mugen will not die turn 1.

Wind

Viking

Viking takes the classic Wind damage combo of Narmaya (Grand) and Korwa (Summer) to deal with the omens in the first half and perform a Naru and S.Korwa burst in the second. Viking is a strong choice for class thanks to the strong teamwide buffs, ability to extend buffs with Jomsborg Extend the duration of all allies’ buffs by 1 turn. (Excludes 1-turn buffs.)
All allies gain two random buffs.
, and for the hit counts for cancelling 60 hits.

This setup unfortunately does not offer flexibility in characters with the third slot being Niyon thanks to her strong teamwide buffs. You will want her to be 150 for this for her teamwide dispel cancel.

Viking
Korwa (Summer)
Narmaya (Grand)
Niyon
Tikoh
Katzelia
Main
Friend
Sub
Tiamat Omega
Qilin
Nobiyo
Beelzebub
Demonbream
Tiamat Omega
Raphael
Temperance (SSR)
Windhose
Gateway-Star Sword
Tiamat Bolt Omega
Spear of Renunciation
Tiamat Bolt Aura
Tiamat Bolt Aura
Tiamat Bolt Aura
Last Storm Harp
Coruscant Crozier
Coruscant Crozier
Theater of Temperance
Arkab Prior Militis
Arkab Prior Militis
Viking
Korwa (Summer)
Narmaya (Grand)
Niyon
Tikoh
Katzelia
Main
Friend
Sub
Tiamat Omega
Qilin
Nobiyo
Beelzebub
Demonbream
Tiamat Omega
Raphael
Triple Zero
Spada di Vento Mk II
Gateway-Star Sword
Tiamat Bolt Omega
Spear of Renunciation
Tiamat Bolt Aura
Tiamat Bolt Aura
Tiamat Bolt Aura
Last Storm Harp
Coruscant Crozier
Coruscant Crozier
Ultima Blade
Theater of Temperance
Prayer of Grand Gales
Viking
Korwa (Summer)
Narmaya (Grand)
Niyon
Tikoh
Katzelia
Main
Friend
Sub
Zephyrus
Qilin
Triple Zero
Beelzebub
Demonbream
Zephyrus
Raphael
Ewiyar
Evanescence
Claíomh Solais Díon
Claíomh Solais Díon
Claíomh Solais Díon
Piercing Galewing
Piercing Galewing
Vortex of the Void
Kaguya’s Folding Fan
Spear of Repudiation
Ultima Blade
Theater of Temperance
Prayer of Grand Gales

Starting Rotation

53% Burst Rotation

Omen Cancels

References

Notes
  • Any charge bar summon can be used in place of Nobiyo or Zeph.
  • Maintain echoes and other strong buffs as long as you can by saving Extend the duration of all allies’ buffs by 1 turn. (Excludes 1-turn buffs.)
    All allies gain two random buffs.
    for when Narmaya’s and S.Korwa’s echoes are up. CA as needed as well to reapply.
  • Until you clear 60 hits, be sure to hold Narmaya’s CA until the turn before a Arcadia omen.
  • When the extra Fil are available, use Korwa (Summer)’s skill 2 Soie Elegante Grant a Wind ally Magnifique (100% DEF Up / 30% reduced DMG taken / 100% Debuff Resistance Up).
    (Consumes 3 Fil (Summer).)
    on characters without it as the strong defensive buffs goes a long way. Otherwise use her skill 1 Ligne d’Ete Grant a Wind ally Coquetterie (50% Wind ATK Up / 80% DA / 30% TA), Double Strike (1T), and DMG Cap Boosted (50%, 1T).
    (Consumes 3 Fil (Summer).)
    as frequently as needed to increase Naru’s damage output. Until you clear 60 hits, make sure to never drop below 3 Fil.
  • You will want to prepare a burst before entering coccoon. See the 53% burst section for more info and the rotation.

Runeslayer

Ruleslayer is an alternative setup using similar selection of characters. The Ultimate Mastery skill Multiplying Magic Gain Multiplying Magic. (Can’t be recast.) offers very strong buffs for MC most notably but not limited to GTA and split autos. Overall it is less micro managing than Viking while still offering strong offense and defense.

Like the prior, this setup unfortunately does not offer flexibility in characters outside being able to choose between Ewiyar (Grand) and Korwa (Summer). This will mostly focus on the Ewiyar version. For Korwa, much of the same general strategy and omen cancels are the same as the Viking one.

Runeslayer
Ewiyar (Grand)
Niyon
Narmaya (Grand)
Tikoh
Katzelia
Main
Friend
Sub
Tiamat Omega
Qilin
Beelzebub
Thor
Owlcat
Tiamat Omega
Raphael
Temperance (SSR)
Arkab Prior Militis
Tiamat Bolt Aura
Tiamat Bolt Aura
Tiamat Bolt Aura
Coruscant Crozier
Coruscant Crozier
Last Storm Harp
Covenant-Ruin Fist
Tiamat Bolt Omega
Spear of Renunciation
Theater of Temperance
Arkab Prior Militis
Worldscathing Leon
Runeslayer
Ewiyar (Grand)
Niyon
Narmaya (Grand)
Tikoh
Katzelia
Main
Friend
Sub
Tiamat Omega
Qilin
Beelzebub
Thor
Owlcat
Tiamat Omega
Raphael
Temperance (SSR)
Arkab Prior Militis
Tiamat Bolt Aura
Tiamat Bolt Aura
Tiamat Bolt Aura
Coruscant Crozier
Coruscant Crozier
Last Storm Harp
Gateway-Star Sword
Claíomh Solais Díon
Spear of Renunciation
Ultima Blade
Theater of Temperance
Prayer of Grand Gales
Runeslayer
Ewiyar (Grand)
Niyon
Narmaya (Grand)
Tikoh
Katzelia
Main
Friend
Sub
Lucifer
Belial
Halluel and Malluel
Ewiyar
Rose Queen (Summer)
Zephyrus
Raphael
Temperance (SSR)
Creepy Claws
Claíomh Solais Díon
Claíomh Solais Díon
Claíomh Solais Díon
Piercing Galewing
Piercing Galewing
Vortex of the Void
Kaguya’s Folding Fan
Spear of Repudiation
Ultima Blade
Prayer of Grand Gales
Theater of Temperance

Starting Rotation

Omen Cancels

References

Notes
  • Reapply Ewiyar’s skill 1 Appawlingly Adorable Inflict Charmed (Can’t be removed) (30%, Accuracy: 200%, 5T) on all other Wind allies.Inflict Charmed 5 (30%, Accuracy: 200%, 5T) on all foes.Gain Dodge All 1 (1 times). as soon as it is available.
  • Creepy Claws is the ideal mainhand for the extra echoes.
  • Generally pretty safe to mash turns.
  • Use 24-hit elemental damage to random foes.
    Restore all allies’ HP (Healing cap: 10000).
    Remove all debuffs from all allies.
    (Consumes 1 Magic Circle (Fire Circle
    Water Circle
    Earth Circle
    Wind Circle
    Light Circle
    Dark Circle) of each element.)
    if you need the healing and clear.
  • Save Nio’s skill 4 Nine-Realm’s Security All allies gain TA Up (100%, 4T) and Bonus Wind DMG (50%, 4T).
    (Can’t recast.)
    for right after coccoon. Try to line up Naru’s 1 and 3 along with calling your echo summon.
    • If running Qilin, can do a similar burst to the Viking setup.

Rhomphaia

Similar to the prior strategies, Spartan with the 150GM weapon Rhomphaia is another strong choice for wind. It plays pretty similarly to Viking and Runeslayer but is stronger thanks to the power of Rhomphaia’s split autos as well as teamwide echoes on CA. Also like Runeslayer, you can run either Korwa (Summer) or Ewiyar (Grand).

Spartan
Niyon
Korwa (Summer)
Narmaya (Grand)
Tikoh
Katzelia
Main
Friend
Sub
Beelzebub
Rose Queen (Summer)
Ewiyar
Lucifer
Qilin
Zephyrus
Raphael
Belial
Rhomphaia
Claíomh Solais Díon
Claíomh Solais Díon
Claíomh Solais Díon
Kaguya’s Folding Fan
Piercing Galewing
Piercing Galewing
Spear of Repudiation
Ultima Spear
Theater of Temperance
Prayer of Grand Gales

Starting Rotation

Omen Cancels

References

Notes
  • Maintain echoes from Rhomp or Korwa CA when possible.
    • Selective guard people when you need to CA to reduce lockout.
  • Generally safe to mash everything. Really only need to bother with cancelling 60 hits.

Light

Kengo

Light’s recent Kengo powerhouse of Cosmos, Horus (Summer), and Seruel makes the Kengo route one of the strongest for Light. The trio offers a lot of sustain, CA damage, and skill damage each turn.

Cosmos is an excellent CA damage dealer thanks to her perma CA reactivation and 6 hit skill damage after charge attacks after getting her skill 3 Halo Attunement Gain Halo Attunement, Instant Charge, and Unchallenged (1T).
Set HP to 50% of max HP.
(From 2nd cast onwards:
End cooldown for caster’s other skills.
Can use each damage skill up to one extra time this turn.)
up. She is also helpful for CA looping with Kengo as her 20% bar via her skill 2 Blast Erasure 800% Light damage to a foe (Damage cap: ~820,000).
Inflict Double Attack Rate Lowered (Stackable) (10% (40% Max), Accuracy: 100%, 180s) and Triple Attack Rate Lowered (Stackable) (10% (40% Max), Accuracy: 100%, 180s).
Gain Charge Bar (20%).
(While Halo Attunement is in effect: Auto-activates upon normal attacks.)
will often be enough to full chain again with Kengo.

Horus (Summer) revolves around her Eye of Wadjet special buff. With it, she gains the ability to CA twice and her skill damage nuke on CA activates twice for 8 debuffs per CA and 16 total per turn. With it she also provides 1k healing and 10% charge bar to party every turn. Her skill 3 Saqr Al-Himayah is also party wide instant charge which is excellent if you are unable to loop on a given turn. So when using her, do your best to keep using Fated Chains to maintain her buff.

Last up is Seruel (Summer). Seruel is an excellent CA support. He is most notable for his skill 1 Sunlight Raid 2-hit, 250% Light damage to a foe (Damage cap: ~350,000 per hit).
Restore Light allies’ HP (Healing cap: 2000).
All Light allies gain Charge Bar (20%).
Raise caster’s Solas lvl by 1.
(When activated at Solas lvl 3:
Consumes all Solas lvls.
Charge bar boost changes to Charge Bar (100%).)
which provides 20% bar and 2k healing to party. This skill autocasts every three turns. And then every three uses of it, it will provide 100% bar instead for an easy full chain. His skill 2 Glowing Litany Gain C.A. Reactivation (1 time).
All allies gain C.A. DMG Boosted (Stackable / Can’t be removed) (20% (100% Max)) and C.A. DMG Cap Boosted (Stackable / Can’t be removed) (10% (50% Max)).
is also great due to granting himself CA reactivation and the party 20% (100% max) stackable CA damage and 10% (50% max) stackable CA damage cap. His CA is also useful due to providing 10% party charge and 10% (50% max) stackable light ATK up.

Up to one of these characters can be replaced by Yuni. Ideally that would be Seruel. Yuni allows for some safer play and more secure full chains thanks to the 1 turn cooldown on her sklill 1 Revitalise All Light allies gain Charge Boost (10%).Restore 10% of all Light allies’ HP (Healing cap: 1000) and 2-turn cut to debuff durations.(Gain 1 Precious Wish.) , but the damage output is a lot less than using Seruel.

Kengo
Cosmos
Horus (Summer)
Seruel (Summer)
Ladiva (Valentine)
Sandalphon
Main
Friend
Sub
Luminiera Omega
Beelzebub
Qilin
Aoi Todo
Nobiyo
Lucifer
Metatron
Sandalphon
Unsigned Kaneshige (Light)
Luminiera Bolt Credo
Luminiera Lance Credo
Gateway-Star Sword
Luminiera Sword Omega
Sword of Renunciation
Dagger of Bahamut Coda
Worldforging Moros
Heliogabalus Militis
Kengo
Cosmos
Horus (Summer)
Seruel (Summer)
Ladiva (Valentine)
Sandalphon
Main
Friend
Sub
Luminiera Omega
Beelzebub
Triple Zero
Aoi Todo
Nobiyo
Lucifer
Metatron
Artemis
Unsigned Kaneshige (Light)
Luminiera Bolt Credo
Luminiera Lance Credo
Gateway-Star Sword
Luminiera Sword Omega
Sword of Renunciation
Ultima Sword
Worldforging Moros
Radiance of Insightful Rebirth
Kengo
Cosmos
Horus (Summer)
Seruel (Summer)
Ladiva (Valentine)
Sandalphon
Main
Friend
Sub
Zeus
Belial
Beelzebub
Lu Woh
Triple Zero
Zeus
Grand Order
Metatron
Unsigned Kaneshige (Light)
Efes
Efes
Ivory Ark
Harmonia
Harmonia
Diaitesia
Radiant Rinne
Symmetria Mk II
Sword of Repudiation
Ultima Sword
Worldforging Moros
Radiance of Insightful Rebirth

Starting Rotation

Omen Cancels

References

Notes
  • Use Uplifted Charge bar is boosted on every turn summons like Aoi Todo or Zeus as frequently as you can.
  • Use Cosmos’s skill 2 Blast Erasure 800% Light damage to a foe (Damage cap: ~820,000).
    Inflict Double Attack Rate Lowered (Stackable) (10% (40% Max), Accuracy: 100%, 180s) and Triple Attack Rate Lowered (Stackable) (10% (40% Max), Accuracy: 100%, 180s).
    Gain Charge Bar (20%).
    (While Halo Attunement is in effect: Auto-activates upon normal attacks.)
    and Seruel’s skill 1 Sunlight Raid 2-hit, 250% Light damage to a foe (Damage cap: ~350,000 per hit).
    Restore Light allies’ HP (Healing cap: 2000).
    All Light allies gain Charge Bar (20%).
    Raise caster’s Solas lvl by 1.
    (When activated at Solas lvl 3:
    Consumes all Solas lvls.
    Charge bar boost changes to Charge Bar (100%).)
    to keep up full chains especially after 75%.
    • Teamwide buff skills on MC are also good to slot in order to
  • Use charge bar summons whenever you need to.
  • Take non CA turns between omens either to reduce lockout between Omen cancels or to fill up CA meter if needed.
    • Be careful to not lose Horus’s Eye of Wadjet buff doing so.
  • Use Fated Chains frequently to maintain Horus’s Eye of Wadjet buff.

Monk

Another option for Light to mash with Monk. Below is an adapted solo setup. Because of that, it wouldn’t work well in very fast rooms but will perform great for slower ones.

The primary trio of this setup that makes it work is Makura, Lu Woh, and Mugen (Halloween). Makura swaps in the backline with her skill 3 Haring Escape Switch positions with a sub ally.
Makura gains Jade Moonlight.(When switching with a Light ally:
Ally receives Makura’s buffs.)
(Can’t be recast.)
transfering any buffs from her onto the person brought in. This pairs great with her skill 1 Nitotsuisou Gain Nitotsuisou 2. (Ends upon taking damage 2 times.) providing double strike and 4 hit nukes after normal attacks. The buff ends after taking damage two times. This is where Mugen comes in. His skill 1 Cloaked Guardian Gain Substituted (Select/Can’t be removed), Dark DMG Lowered (Can’t be removed) (30%), and Dark Switch (Can’t be removed).(Only substitutes for a selected ally. Can’t recast.) pernamently subs for another character. So that way the swapped in character can maintain Makura’s buffs for a very long time. Then, the swap in will be Lu Woh thanks to his skill damage and debuffs on normal attacks as well as his strong buffs he provides to the team.

Lu Woh could be replaced by another character like Lucio or Tweyen. Just keep in mind either the damage will be lower like in the case of Song or you will be light on the debuffs in the case of Lucio.

The last major slot is an additional support. Ideally this is Mahira (Holiday) cuz she provides strong debuffs and very spammable skills if needed to clear debuff or hit count omens. The best options to replace her would be skill damage support characters like Illnott (Holiday) or Robertina. They wouldn’t be able to handle the debuff omens but in a room especially a faster one its not a dealbreaker.

There is also a sub all slot. This can be anyone who can survive until Turn 3 in order to do a sub all. Ideally this is Vira (Grand) but a very discount option like Pecorine works.

Monk
Vira (Grand)
Mahira (Holiday)
Makura
Mugen (Halloween)
Lu Woh
Main
Friend
Sub
Luminiera Omega
Belial
Beelzebub
Qilin
Halluel and Malluel
Lucifer
Sandalphon
Metatron
Exo Aristarchus
Luminiera Bolt Credo
Phantom Fangs
Luminiera Lance Credo
Covenant-Ruin Fist
Luminiera Sword Omega
Sword of Renunciation
Koukouvagia Militis
Worldbreaking Tauros
Worldvexing Angelos
Monk
Vira (Grand)
Mahira (Holiday)
Makura
Mugen
Lu Woh
Main
Friend
Sub
Luminiera Omega
Beelzebub
Lucifer
Qilin
Triple Zero
Lucifer
Belial
Metatron
Exo Aristarchus
Luminiera Bolt Credo
Harmonia
Harmonia
Covenant-Ruin Fist
Luminiera Lance Credo
Radiance of Insightful Rebirth
Sword of Renunciation
Ultima Claw
Worldbreaking Tauros
Worldvexing Angelos
Monk
Vira (Grand)
Mahira (Holiday)
Makura
Mugen (Halloween)
Lu Woh
Main
Friend
Sub
Zeus
Belial
Beelzebub
Triple Zero
Thor
Lucifer
Lu Woh
Metatron
Exo Aristarchus
Efes
Efes
Efes
Harmonia
Harmonia
Imperious Fury
Radiant Rinne
Radiant Rinne
Sword of Repudiation
Ultima Claw
Worldbreaking Tauros
Radiance of Insightful Rebirth
Monk
Vira (Grand)
Mahira (Holiday)
Makura
Mugen (Halloween)
Lu Woh
Main
Friend
Sub
Zeus
Belial
Beelzebub
Triple Zero
Thor
Lucifer
Lu Woh
Metatron
Golden Fists of Ura
Efes
Efes
Efes
Harmonia
Harmonia
Imperious Fury
Radiant Rinne
Radiant Rinne
Sword of Repudiation
Ultima Claw
Worldbreaking Tauros
Radiance of Insightful Rebirth

Starting Rotation

Omen Cancels

References

Notes
  • CAs should be off unless needed to cancel an omen.
  • Guard Mugen (Halloween) and Mahira (Holiday) every turn to reduce lockout and keep Mugen alive.
  • Most important thing is making sure you can cancel all omens with just two characters attacking. With 6 mans, you can leave only Mugen guarded if you need additional damage per turn.

Dark

Imposter

The Dark Imposter or Dark Sus strat is a strategy in which Dark pretends to be another element in order to lower a more useful set of Tenents instead of the Dark ones. This works because Tenents are lowered based solely on the element of the Main Character. So if you equip an off element mainhand, you will lower the Tenents of the element of that mainhand. Then by using the skill Change Main Character switches positions with a sub ally. with Nighthound, you can swap out MC for a full Dark frontline.

This does come with the main drawback of not being able to easily call summons if needed. You can still swap around to get the MC back to do so but it does require 5 button presses to do so.

The core three for this is Fediel, Lich, and Rei. Fediel is the primary damage dealer thanks her skill nukes on auto attacks and double CAs while also providing lots of defense via her field. Lich provides much needed debuffs for survivability as well as providing healing via Death’s Grace and the DoT damage from Fediel’s field. Rei not only provides double strike to one person, namely Fediel, but also packs a swap needed for bringing MC back in or for handling 75%. She’s also great for nullifying damage via Cold Stare Take control of all foes, inflicting Cold Stare 1 (Accuracy: g, 1T) on all foes. and her ability to skip turns via Ama no Sakate Progress battle turn by 5 at end of turn.
(Activates only when caster is a main ally. Can’t recast.)
is great either to gets skills off cooldown or skip through enemy buffs.

The last option can be another character strong for Charge Attacks or Skill damage like Seox or Eustace (Dark). Seox should at least be 130 for this.

Nighthound
Fediel
Lich
Rei
Seox
Kolulu
Main
Friend
Sub
Celeste Omega
Belial
Qilin
Thor
Celeste Omega
Zirnitra
Sariel
Celeste Grace Ater
Celeste Grace Ater
Covenant-Ruin Fist
Celeste Saber Ater
Celeste Saber Ater
Celeste Dagger Ater
Abyss Spine
Pain and Suffering
Katana of Renunciation
Spear of Bahamut Coda
Worldbreaking Tauros
Ramsund Militis
Nighthound
Fediel
Lich
Rei
Seox
Kolulu
Main
Friend
Sub
Celeste Omega
Belial
Sariel
Qilin
Thor
Celeste Omega
Zirnitra
Grand Order
Celeste Grace Ater
Celeste Grace Ater
Covenant-Ruin Fist
Celeste Saber Ater
Celeste Saber Ater
Celeste Dagger Ater
Abyss Spine
Pain and Suffering
Katana of Renunciation
Ultima Claw
Worldbreaking Tauros
Festering of Mournful Obsequies
Nighthound
Fediel
Lich
Rei
Seox
Kolulu
Main
Friend
Sub
Hades
Belial
Sariel
Qilin
Thor
Hades
Fediel
Grand Order
Eternal Signature
Eternal Signature
Eternal Signature
Pain and Suffering
Pain and Suffering
Covenant-Ruin Fist
Skeletal Eclipse
Skeletal Eclipse
Katana of Repudiation
Ultima Claw
Pain of Death
Festering of Mournful Obsequies

Starting Rotation

Omen Cancels

References

Notes
  • Mainhand any bow with high stats.
  • Kolulu can be any sub all character.
  • Save CAs for damage Omen turns.
  • Add red skills if you can’t reliably clear the early damage omens. Later in the fight with lowered Earth stacks it will be easier with CA chains.
  • If using Eustace, apply Flamek Thunder 250%-350% Earth damage to all foes (Damage cap: ~510,000).
    Inflict Paralyzed 2 (Accuracy: 70%, 2T).
    to Fediel.
  • Use Rei’s skill 4 Ama no Sakate Progress battle turn by 5 at end of turn.
    (Activates only when caster is a main ally. Can’t recast.)
    as needed to get skills off cooldown or to run out the timer on an annoying debuff.
  • To use a summon, you will need to:
    • Remove Rei S1 Take control of another Dark ally, granting them Double Strike (Can’t be removed).
      (Ends on recast.)
    • Rei S2 Switch positions with a sub ally.
      (When switching with a Dark ally: Take control of the ally, granting them Moksha (30% ATK Up, guaranteed triple attacks, 20% DMG Cap Up, 30% Dodge Rate Up, and 50% DEF Down, Multiplier: Perpetuity).)
    • Call Summon
    • Nighthound Main Character switches positions with a sub ally.
    • Rei S1 Take control of another Dark ally, granting them Double Strike (Can’t be removed).
      (Ends on recast.)
      =>

Manadiver

In Faster rooms, Dark can play as Dark. One of the best ways to do this is with Manadiver thanks to the consistent skill damage from MC. In general with this setup, you can safely mash turns and through any omen without needing to worry about cancelling them.

The two most important characters are Fediel and Rei for similar reasons as before. Rei can be replaced with another character if you don’t have her.

For the remaining slots, some of the options include Ilsa (Yukata), Nier FLB, Lich, and Seox. Anyone who can deal lots of damage without much input can work.

For the Daedalus Drive, one can choose to use Rei to swap out a sub all tank like Kolulu, but it is also an option to heal and tank it instead.

Manadiver
Fediel
Rei
Lich
Kolulu
Main
Friend
Sub
Celeste Omega
Beelzebub
Death (SSR)
Qilin
Thor
Celeste Omega
Belial
Sariel
Celeste Dagger Ater
Celeste Grace Ater
Celeste Grace Ater
Covenant-Ruin Fist
Celeste Saber Ater
Celeste Saber Ater
Pain and Suffering
Abyss Spine
Abyss Spine
Katana of Renunciation
Ramsund Militis
Ramsund Militis
Dagger of Bahamut Coda
Manadiver
Fediel
Ilsa (Yukata)
Mugen
Nier
Rei
Main
Friend
Sub
Celeste Omega
Belial
Bahamut
Triple Zero
Lucifer
Celeste Omega
Grand Order
Sariel
Celeste Dagger Ater
Celeste Grace Ater
Celeste Grace Ater
Covenant-Ruin Fist
Celeste Saber Ater
Celeste Saber Ater
Forsaken Agastia
Pain and Suffering
Pain and Suffering
Katana of Renunciation
Ultima Gun
Pain of Death
Festering of Mournful Obsequies
Manadiver
Fediel
Ilsa (Yukata)
Mugen
Nier
Rei
Main
Friend
Sub
Hades
Belial
Fediel
Triple Zero
Bahamut
Hades
Grand Order
Sariel
Eternal Signature
Eternal Signature
Eternal Signature
Covenant-Ruin Fist
Pain and Suffering
Pain and Suffering
Fallen Sword
Skeletal Eclipse
Skeletal Eclipse
Katana of Repudiation
Ultima Gun
Pain of Death
Festering of Mournful Obsequies

Starting Rotation (Lich)

Starting Rotation (Ilsa)

Omen Cancels

References

Notes
  • Reapply important buffs when down.
  • Attach Rei’s skill 1 Alaya-Vijnana Take control of another Dark ally, granting them Double Strike (Can’t be removed).
    (Ends on recast.)
    to Manadiver for best results.
  • If using Lich, you will need to do a sacc for 75%.

Eresh

As well, Dark can use its 150 gm weapon Ereshkigal to burst down the raid. If you use it, you want to go almost all in on offense bringing whatever heavy hitters you have, like Ilsa (Yukata), Seox, Nier, or Cidala. You will also want a way to handle the 75% omen. The below example features Amira who has a sub all and is a dark character so she won’t be dead weight while attacking.

Berserker is the ideal class for this due to being able to extend the Eresh instant charge buff with Jomsborg Extend the duration of all allies’ buffs by 1 turn. (Excludes 1-turn buffs.)
All allies gain two random buffs.
and being able to fill the CA again with Full Arsenal III Gain C.A. Instant Standby, ATK Up (50%, Multiplier: Normal, 1T), and Chain Burst DMG Boosted (30%, 1T).
Level 30:
Also gain C.A. DMG Boosted (1 time) (20%) and C.A. DMG Cap Boosted (1 time) (10%).
and Splitting Spirit Convert caster’s HP to charge bar (3% charge bar for every 250 HP consumed, up to 100% charge bar).
(Consumes up to 50% of current HP.)
.

Berserker
Seox
Ilsa (Yukata)
Fediel
Amira (Summer)
Nier
Main
Friend
Sub
Lucifer
Death (SSR)
Qilin
Beelzebub
Fediel
Hades
Belial
Sariel
Ereshkigal
Eternal Signature
Eternal Signature
Eternal Signature
Pain and Suffering
Pain and Suffering
Parazonium
Covenant-Ruin Fist
Fallen Sword
Katana of Repudiation
Dagger of Bahamut Coda
Pain of Death
Festering of Mournful Obsequies

Starting Rotation

Omen Cancels

Reference Videos

Notes
  • Reapply Seox 1 S1 Gain Adversity (20%, Multiplier: Seraphic, 3t).
    Level 95:
    Buff increased to Adversity (30%, Multiplier: Seraphic, 3t).
    Also gain Bonus Dark DMG (60%, 3t).
    and 2 S2 Gain Full Hostility (1t) and Counter on Dodge (500%, 3 times, 1t).
    Level 85:
    Counter upgraded to Counters on Dodge/DMG (500%, 6 times, 3t).
    Level 130:
    When Heavenly Howl lvl is 6: Also gain Double Strike (Can’t be removed) (1T).
    and Ilsa (Yukata) once available or buffs are expired in case of Ilsa skill reset.
  • Use Ilsa (Yukata)’s skill 3 Diva Satanica Increase number of times caster does an attack this turn based on number of Diuturna (Max: Quadruple Strike (1T)). on any turn without an MC CA.

Execute

Execute (待機) is a role dedicated to clearing the last the 10% of SUBHL. Execute setups take advantage of the 10% unchallenged not applying until exiting Cocoon. So if you wait before 51%, one can deal damage to take take out the last 10% of SUBHL without needing to deal with Sirius Origin. Many setups now deal well over 20% of SUBHL’s HP via execute.

Water

Water is the current best option for an execute setup both being the fastest as well as being the strongest.

Generally for this, the two main irreplacable characters are Lucio (Summer) and Erika. The former provides all important GTA to MC as well as having both 90% targetable bonus damage and 20% teamwide bonus damage. Then Erika has a targetable instant attack for more rounds of damage.

Behind them, is Haaselia. While you can do it without her, the difference in output with and without her at FLB is night and day both thanks to the large amounts of cap up provided between her and her weapon as well as skill damage after all multi attacks. This said, pre FLB she is still an excellent choice thanks to her weapon at FLB still providing the large 30% cap up and Haase being the best way to get to the full moon buff by advancing the phase with her skill 3 Phases of the Moon All Water allies gain Water ATK Up (20%, 2T), Tears of Lunacy (2T), and Charge Boost (15%).
Moon waxes.

After that there is a fair bit of flexibility in who you can use. As long as they have echoes that stack with the existing echoes, you can use them in the remaining slots. Some options are Korwa (Water), Mary (Holiday), Dorothy and Claudia, Nier, Anila (Summer), and Narmaya (Valentine).

Exo

Relic Buster
Nier
Lucio (Summer)
Dorothy and Claudia
Erika
Haaselia
Main
Friend
Sub
Beelzebub
Belial
Belial (Summer)
The Moon (SSR)
Grand Order
Qilin
Gabriel
Yatima
Exo Antaeus
Exo Antaeus
Exo Antaeus
Exo Antaeus
Exo Antaeus
Exo Antaeus
Gateway-Star Sword
Esna
Esna
Staff of Renunciation
Ultima Gun
Reflection of The Moon
Worldscathing Leon
Relic Buster
Nier
Lucio (Summer)
Dorothy and Claudia
Erika
Haaselia
Main
Friend
Sub
Beelzebub
Belial
Belial (Summer)
Grand Order
Qilin
Gabriel
Yatima
Exo Antaeus
Schrodinger Mk II
Schrodinger Mk II
Schrodinger Mk II
Schrodinger
Gateway-Star Sword
Judgment of Torrential Tides
Esna
Esna
Staff of Renunciation
Ultima Gun
Reflection of The Moon
Worldscathing Leon

Rotation with MLB Haase

Rotation with FLB Haase

Reference Videos

Notes
  • Adjust HP via EMPs and Awakenings as needed to make sure anyone who needs to live has at least 40k HP and anyone who needs to die has less.

Hraesvelgr

Relic Buster
Erika
Korwa (Water)
Lucio (Summer)
Haaselia
Mary (Holiday)
Main
Friend
Sub
Beelzebub
Belial
Belial (Summer)
Wamdus
Grand Order
Qilin
Gabriel
Yatima
Hraesvelgr
Calamitous Aquashade
Rise of Justice
Calamitous Aquashade
Pistol of Bahamut Coda
Esna
Esna
Staff of Repudiation
Ultima Gun
Reflection of The Moon
Judgment of Torrential Tides
Relic Buster
Nier
Lucio (Summer)
Dorothy and Claudia
Erika
Haaselia
Main
Friend
Sub
Beelzebub
Belial
Belial (Summer)
Grand Order
Qilin
Gabriel
Yatima
Hraesvelgr
Schrodinger Mk II
Schrodinger Mk II
Schrodinger Mk II
Schrodinger
Schrodinger
Schrodinger
Esna
Esna
Staff of Renunciation
Ultima Gun
Reflection of The Moon
Judgment of Torrential Tides

Rotation

Reference Videos

Notes
  • Adjust HP via EMPs and Awakenings as needed to make sure anyone who needs to live has at least 40k HP and anyone who needs to die has less.

Soldier

Soldier
Sho
Catura (Holiday)
Jeanne d’Arc (Water Summer)
Erika
Haaselia
Main
Friend
Sub
Bahamut
Godsworn Alexiel
Belial (Summer)
Wamdus
Yatima
Qilin
Gabriel
Belial
Hraesvelgr
Exo Antaeus
Exo Antaeus
Worldscathing Leon
I
II
III
IV
V
VI
Exo Antaeus
Exo Antaeus
Gateway-Star Sword
Esna
Esna
Staff of Renunciation
Ultima Gun
Reflection of The Moon
Judgment of Torrential Tides
Soldier
Lucio (Summer)
Anthuria (Holiday)
Zooey (Grand)
Haaselia
Erika
Main
Friend
Sub
Bahamut
Halluel and Malluel
Belial (Summer)
Charybdis
Yatima
Qilin
Gabriel
Belial
Hraesvelgr
Exo Antaeus
Exo Antaeus
Worldscathing Leon
I
II
III
IV
V
VI
Exo Antaeus
Exo Antaeus
Gateway-Star Sword
Esna
Esna
Staff of Renunciation
Ultima Gun
Reflection of The Moon
Judgment of Torrential Tides
Soldier
Nier
Catura (Holiday)
Zooey (Grand)
Erika
Haaselia
Main
Friend
Sub
Beelzebub
Belial
Belial (Summer)
Charybdis
Grand Order
Qilin
Gabriel
Justice (SSR)
Hraesvelgr
Exo Antaeus
Exo Antaeus
Worldscathing Leon
I
II
III
IV
V
VI
Exo Antaeus
Exo Antaeus
Gateway-Star Sword
Esna
Esna
Staff of Renunciation
Ultima Gun
Reflection of The Moon
Judgment of Torrential Tides
Soldier
Nier
Catura (Holiday)
Zooey (Grand)
Erika
Haaselia
Main
Friend
Sub
Beelzebub
Belial
Belial (Summer)
Charybdis
Grand Order
Qilin
Gabriel
Yatima
Hraesvelgr
Exo Antaeus
Exo Antaeus
Worldscathing Leon
I
II
III
IV
V
VI
Exo Antaeus
Exo Antaeus
Gateway-Star Sword
Esna
Esna
Staff of Renunciation
Ultima Gun
Reflection of The Moon
Sword of Bahamut Coda

Rotation (Catura)

Rotation (Anthuria)

Rotation (No Yatima)

Rotation (Exo)

Reference Videos

Light

Next up is light with its classic Relic Buster burst. This uses the combo of strong teamwide buffs from Nehan and Mugen (Halloween) along with a targetable one turn assassin from Florence (Halloween) to hyper buff MC to spam large assassin boosted normal attacks with Blitz Raid Instantly perform a normal attack without using up a turn.
(Consumes 1 Machine Cell.)
. Then, outside those two, you will want buffers that can stack with them as sacs to further boost damage output.

Relic Buster
Dorothy and Claudia
Lecia (Grand)
Mugen (Halloween)
Florence (Halloween)
Nehan
Main
Friend
Sub
Beelzebub
Belial
Halluel and Malluel
Metatron
Artemis
Qilin
Grand Order
Yatima
Sword of Renunciation
Luminiera Bolt Credo
Gateway-Star Sword
Luminiera Sword Omega
Worldscathing Leon
Ultima Gun
Shooting of The Star
Radiance of Insightful Rebirth
Relic Buster
Dorothy and Claudia
Lecia (Grand)
Mugen (Halloween)
Florence (Halloween)
Nehan
Main
Friend
Sub
Beelzebub
Belial
Halluel and Malluel
Metatron
Artemis
Qilin
Grand Order
Yatima
Sword of Repudiation
Efes
Efes
Efes
Imperious Fury
Imperious Fury
Gateway-Star Sword
Harmonia
Harmonia
Worldscathing Leon
Ultima Gun
Shooting of The Star
Radiance of Insightful Rebirth

Rotation (10%)

Rotation (20%)

Reference Videos

Notes
  • Adjust HP via EMPs and Awakenings as needed to make sure anyone who needs to live has at least 40k HP and anyone who needs to die has less.

Dark

Last is Dark which can also perform an Execute rotation with its 150 GM weapon Ereshkigal.

Lumberjack
Nier
Ilsa (Yukata)
Luna
Seox
Narmaya
Main
Friend
Sub
Beelzebub
Belial
Death (SSR)
Zirnitra
Sariel
Qilin
Yatima
Grand Order
Ereshkigal
Eternal Signature
Eternal Signature
Eternal Signature
Pain and Suffering
Pain and Suffering
Parazonium
Covenant-Ruin Fist
Fallen Sword
Katana of Repudiation
Dagger of Bahamut Coda
Pain of Death
Festering of Mournful Obsequies

Rotation

Reference Video

Thor Bot

Last role to cover is a very specialized role that should not be used in pubs and only in coordinate rooms. Thor bots are both a way for weaker players to contribute to the raid by applying debuffs via the summon Thor or to make runs smoother in general thanks to those debuffs. The main restriction to being a Thor bot is having some multi turn sub tanks and a couple of copies of Thor. The setup is simple and requires subing and guarding turns until the Thor cooldowns run out and call Thor as needed so the Thor debuffs won’t run out.


Street King
Vira (Grand)
Alexiel (Summer)
Tien
Main
Friend
Sub
Thor
Thor
Thor
Thor
Thor
Thor
The Tower (SSR)
Sandalphon
Luminiera Bolt Credo
Mittron’s Treasured Blade
Luminiera Bolt Credo
Luminiera Sword Omega
Luminiera Lance Credo
Sword of Renunciation
Dagger of Bahamut Coda

Rotation

Notes
  • Depending on average speed of run will determine how many copies of Thor you want.
    • Thor debuffs last 3 minutes.
    • Faster runs only need one.
    • 10+ minute runs will want 3 copies + the friend support.
    • Number of copies can be mitgated if others run Thor in the raid. The turn 1 Thor from the friend support is the most important.
  • Yatima can be used to increase the number of Thor calls per turn.

Leave a Reply

Your email address will not be published. Required fields are marked *