Colossus Ira Omega is the fire raid of the M3 series. This guide will go over the basic details of the fight as well as setups for fighting it. For more detailed mechanics information, please check the wiki.
Overview
Information
- JP Name: コロッサス・イラマグナ
- HP: 1,013,000,000
- Defense: ??
- Blue Chest: 1,232,496 honors
Links
Drops
These are the most notable drops from this raid. Any unlisted weapons are safe to fodder.

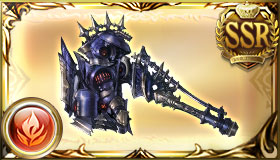
- Mat for converting to Ira Omega Anima.

- Used for uncapping M3 weapons and trranscending Omega summons.
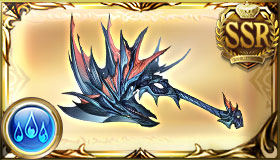
Lava Eruption |
Massive fire DMG to a foe (Inflict DEF Down.) |
|---|
|
Omega Exalto Ardendi
|
20% boost to Ironflame’s weapon skills |
|---|---|
|
Ironflame’s Might III
|
Big boost to fire allies’ ATK |
|
Iron’s Vivification
|
Boost to ATK and DMG cap based on how many weapons with Ironflame’s weapon skills are equipped |
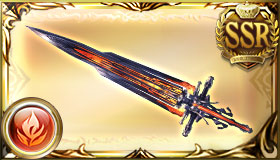
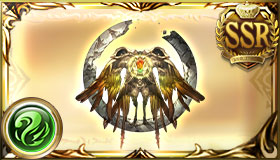
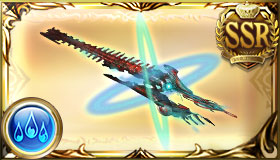
- Core weapon for M3.
- 20% boost to Omega weapon skills and 2% EX and 1% cap up per weapon with an Omega skill slotted.
- Very easy to reach 20% cap up with them.
- 3-4 copies will cover general uise. 5 is for usage with Super Lucilius keys.
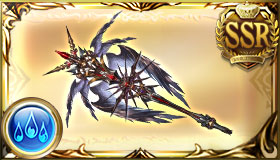
Blazing Bash |
Massive fire DMG to a foe (Inflict DEF Down.) |
|---|
|
Ironflame’s Tempering III
|
Big boost to fire allies’ skill DMG cap / Big supplemental boost to skill DMG |
|---|---|
|
Ironflame’s Might
|
Small boost to fire allies’ ATK |
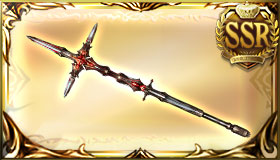
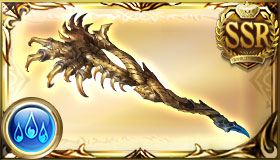
- Omega Big Tempering and small ATK.
- Best option for boosting skill damage in skill damage setups for Colossus.
- Requires a boosted grid to make the most of it.
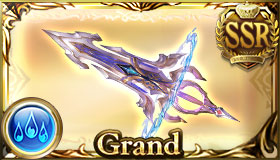
Dimensional Cleave: Extirpation |
Massive fire DMG to a foe (Inflict DEF Down.) |
|---|
|
Ironflame’s Healing III
|
Big boost to fire allies’ healing cap |
|---|---|
|
Ironflame’s Grace
|
Small boost to fire allies’ max HP and debuff resistance |
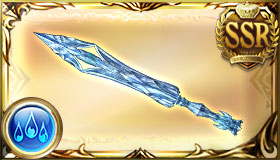
- Big healing cap, small HP, and small debuff resistance in one weapon.
- Excellent option for survivability thanks to healing cap and HP.
- Lack of ATK mods limit how many you want to use at a time.
Conditional Loot

Colossus Ira Omega features a new kind of chest drop. The Conditional Chest’s drop rate will increased based on the player’s in the raid being able to meant a specific condition. Conditions can be completed multiple times for multiple stacks. Each stack on the chest indicates a 10% chance for the chest to drop maxing at 100% at 10 stacks.
For Ira, the condition is to deal 4 hits of 2M damage or more in a turn.
Completing the condition provides a boost of honors. If you can not blue chest the raid, you can aim for the conditional chest and get a solid amount of honors just from doing that.
Blue Chest Setups
Blue chests are awarded based on the amount of honors achieved in a raid maxing out at 99% chance at raid specific amount of honors: 1,232,496 in the case of Colossus Ira Omega. They contain the most desirable drops in a raid such as the weapon drops. When farming a raid, this is the chest you want to aim for. The typical strategy is to deal the blue chest amount and then moving onto the next raid. Below is a list of strategies on how to effectively and quickly achieve blue chests.
Rising Force 
Rotation
- Turn 1
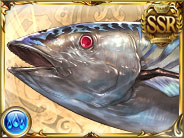
- Bonito

- Fediel (Summer)
 , S1
, S1 All Water allies gain Shield (10,000) and The Black’s Chill (5T).
(Consume 25% of caster’s max HP.) - Poseidon
 , S1
, S1 800% Water damage to a foe (Damage cap: ~1,160,000).
Inflict Tide Father’s Judgment (Accuracy: 200%).
Raise foe’s Thunderstruck (Accuracy: g, 180s) lvl by 1 (Max: 10). (optional) 
- Bonito
- Turn 2 (optional)
- Poseidon
 , S2
, S2 150% Water damage to all foes (Damage cap: ~340,000).
All allies gain ATK Boosted (Stackable) (5% (30% Max), Multiplier: Unique Stackable), DEF Boosted (Stackable) (5% (30% Max)), and Charge Bar (20%).
(Consumes all Tide Father lvls. Boost to activations based on number consumed [Max: 10 times].) 
- Poseidon
- Turn 3 (optional)
- Rising Force

 Elemental damage to a foe. Consume all Feedback on all allies.
(Boost to DMG specs and charge bar based on the number of Feedback consumed.) 
- Rising Force
Notes
- Fediel can be replace by another strong CA character like Helel ben Shalem (Summer)
 , Mirin (Holiday)
 , or Zeta (Water)
 .
. - One turn setups can drop Poseidon for a stronger CA character.
- Without Poseidon, can either take an empty turn 2 or run Huanglong
 support and call it then.
Warlock 

Normal attack focused setup using the Chain of Falsehood to have a turn of teamwide double strike. Warlock’s Ultimate Mastery skill Arcane Field
![]() Gain Arcane Field (Multiplier: Perpetuity).(Effect ends when Arcane Field (Multiplier: Perpetuity) lvl is 7 or charge bar is insufficient at end of turn.)
is an excellent damage boost for grids that have issues with capping as well as providing TA to help those without GTA.
Gain Arcane Field (Multiplier: Perpetuity).(Effect ends when Arcane Field (Multiplier: Perpetuity) lvl is 7 or charge bar is insufficient at end of turn.)
is an excellent damage boost for grids that have issues with capping as well as providing TA to help those without GTA.
Rotation
- Turn 1
- Beelzebub

- Warlock

 Convert caster’s HP to charge bar (3% charge bar for every 250 HP consumed, up to 100% charge bar).
(Consumes up to 50% of current HP.) Fill 3 charge diamonds on all foes.All allies gain Bonus DMG (20%, 3T), Charge Boost (30%), and 1 Elemental Crest (Hellfire CrestDeluge CrestWasteland CrestTyphoon CrestAurora CrestOblivion Crest).(Crest gained based on caster’s element.)
 Gain Arcane Field (Multiplier: Perpetuity).(Effect ends when Arcane Field (Multiplier: Perpetuity) lvl is 7 or charge bar is insufficient at end of turn.)
- Anre
 S2
S2 Gain Substitute (1T) and Counters on Dodge (3 times, 3T).
Level 95:
Also gain Fleeting Spark (280%, Multiplier: Assassin, 1T) - Gabriel
 S2
S2

- Beelzebub
Reference Video
Notes
- Characters can be replaced by any strong attacker or buffer.
- If replacing Gabriel, will need Lucio (Summer)’s
 skill 3 for Anre to have 100% TA.
Manadiver 

Similar to Warlock Manadiver offers teamwide bonus damage and can wield Falsehood opus. Unlike Manadiver, it offers stronger output at less buttons making it a faster option. To emphasis the difference, the characters in the below setup are focused on speed over damage.
Rotation
- Turn 1
- Beelzebub

- Manadiver

 Convert caster’s HP to charge bar (3% charge bar for every 250 HP consumed, up to 100% charge bar).
(Consumes up to 50% of current HP.) , Fill 3 charge diamonds on all foes.All allies gain Bonus DMG (20%, 3T), Charge Boost (30%), and 1 Elemental Crest (Hellfire CrestDeluge CrestWasteland CrestTyphoon CrestAurora CrestOblivion Crest).(Crest gained based on caster’s element.)

- Beelzebub
Reference Video
Notes
- Can replace with any GTA character.
Full Auto
Players can also choose to full auto their own host. While it is slower than blue chesting, it is an easy way to get another drop chance with minimal effort. The following strategies focus on soloing the raid which is particularly helpful for slow periods. But it is strongly reccomended to call up backup request after securing a good blue chest chance to speed up the clear.
Lumberjack 
![]()
Chrysaor 
![]()
Reference Videos
Street King
Standard 

![]()
![]()
![]()
Reference Videos
Notes
- Europa can be replaced by Feower
 or Tefnut (Summer)
 .
. - Alternate character comps are in references.
Ice Girl Alt 
Reference Videos
Other Raids
Links to the other raids.
Raid Pages


















































































2 responses to “Colossus Ira Omega”
Man, I have a deficit in my water party, I’m trying to fit in the best one, but I can’t, I think it’s the only one where the main isn’t hitting 1M.
will there be any future Kengo grid guides in the future. started about 20+ days ago, currently rank 177, looking to main Kengo across all classes. only thing I’m looking for really is grid items to know what to go for, my light and dark are pretty well done, its just the main 4 elements I’m looking to upgrade, especially water, thats my worst for now. If you have a discord server. I’m more than happy to join, i’m always looking for guides and a good way forward to progress in GBF.